-
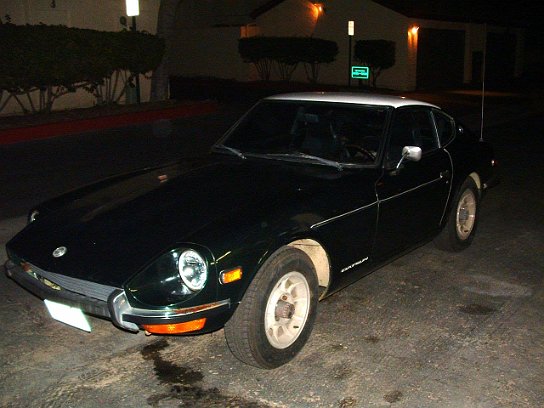
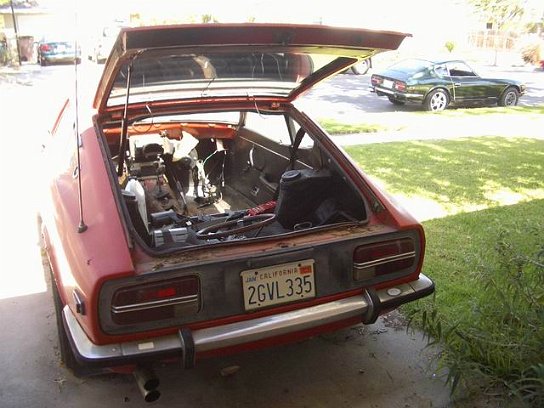
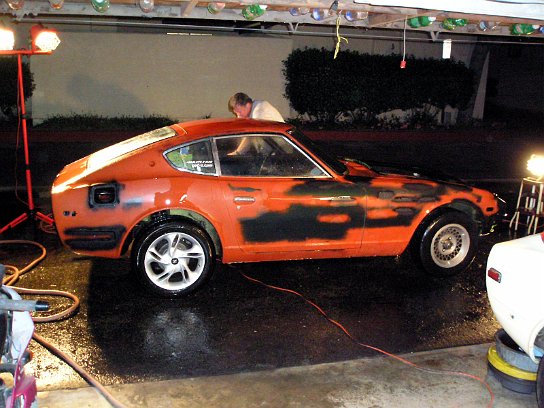
 Picture 022_editedNovember 16, 2003 10:37 PM
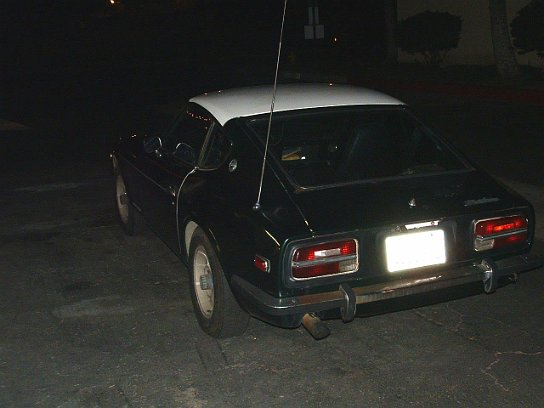
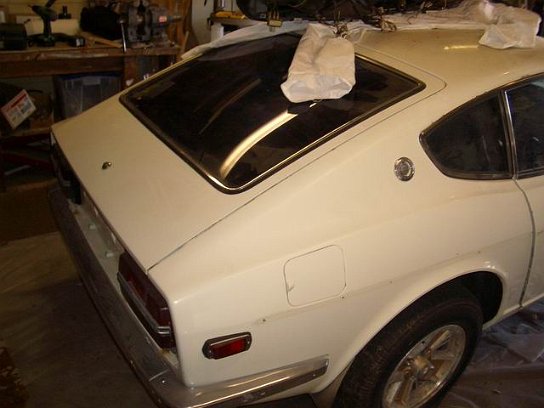
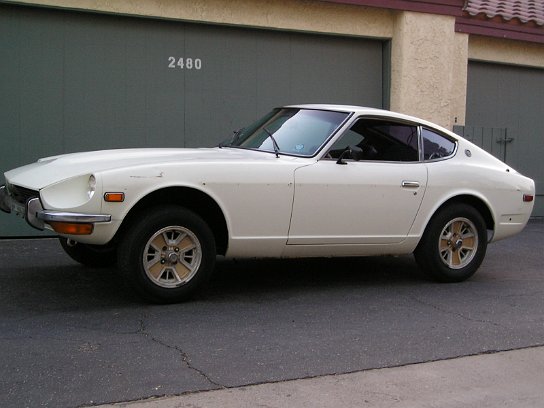
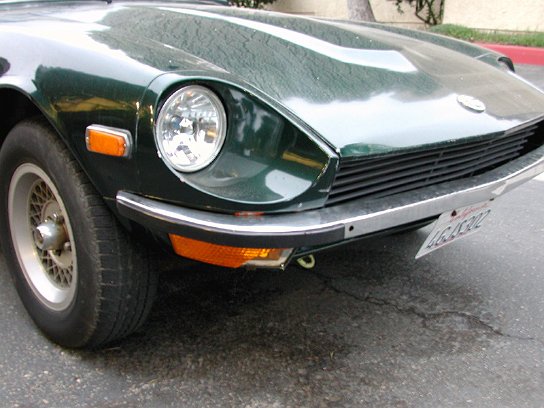
First day home after purchase and a bath.
-
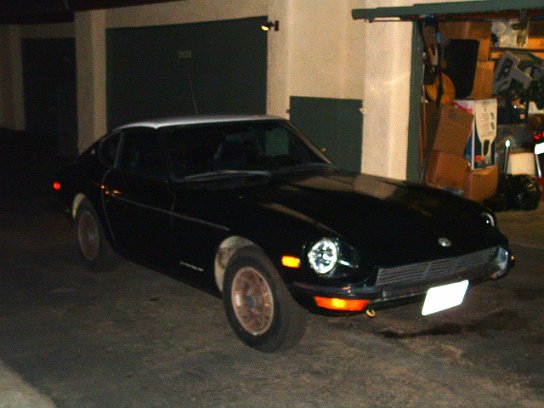
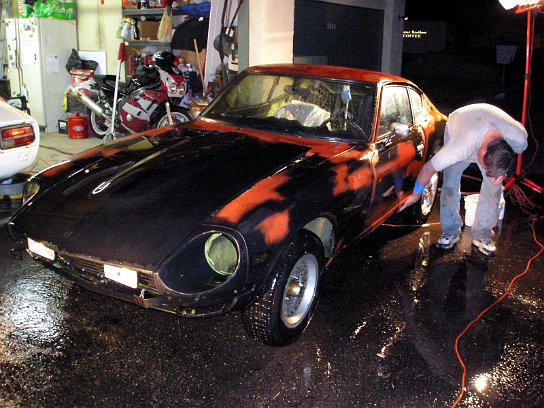
 Picture 018_editedNovember 16, 2003 10:35 PM
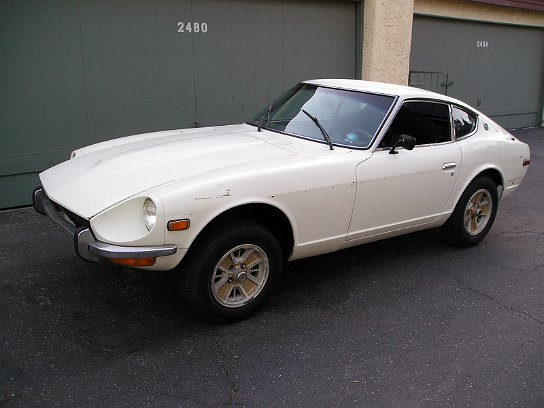
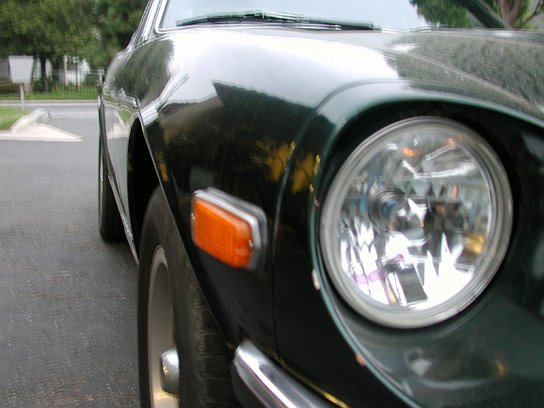
The other side
-
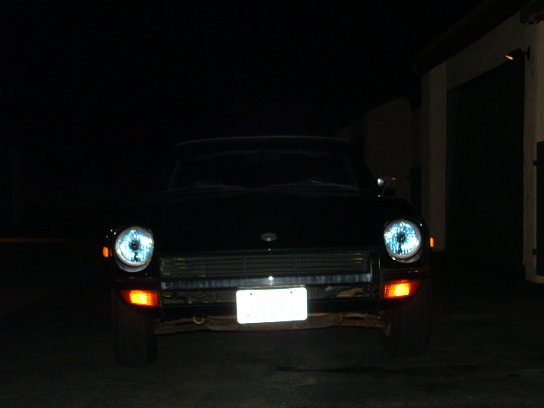
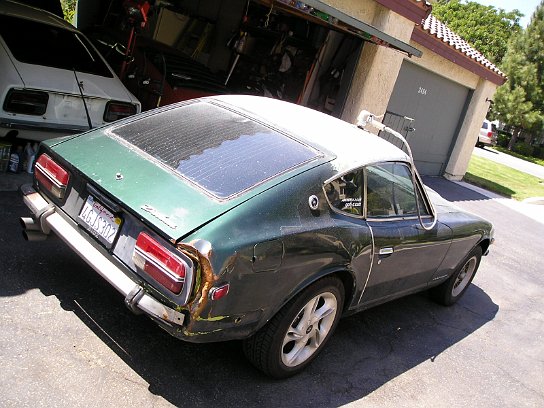
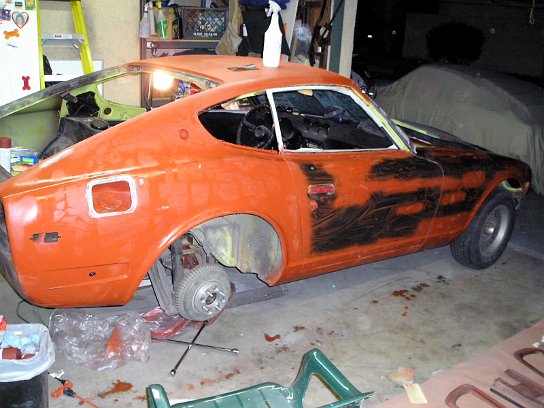
 Picture 015June 16, 2002 4:34 AM
Head on. I know I know...it's a bit dark.
-
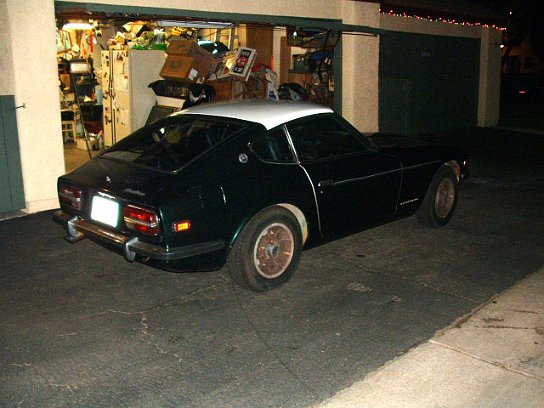
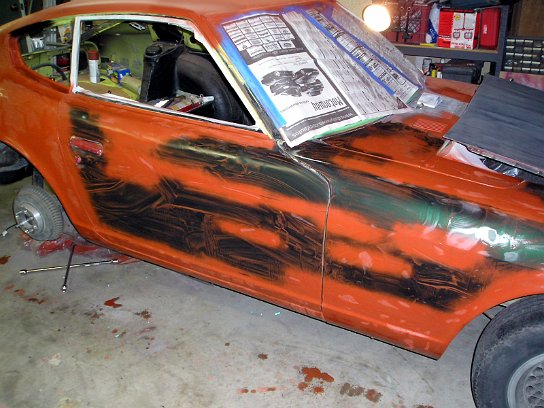
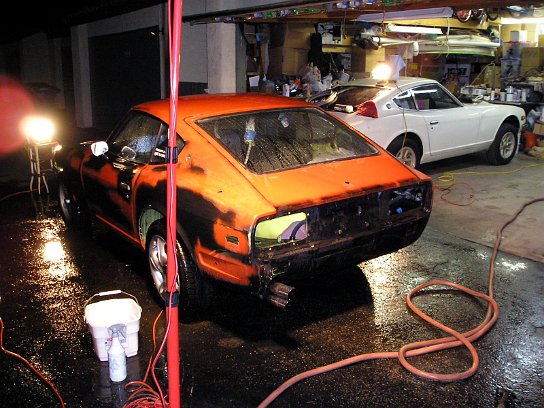
 Picture 023_editedNovember 16, 2003 10:37 PM
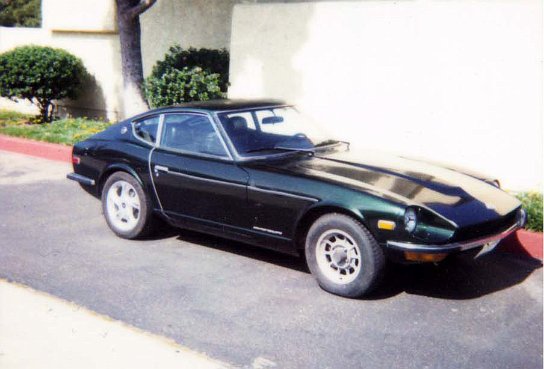
With those colors one might think it came from Brittain. LOL
-
 Picture 025_editedNovember 16, 2003 10:37 PM
Hey look the antenna actually still works, a bit long though, not my taste.
-
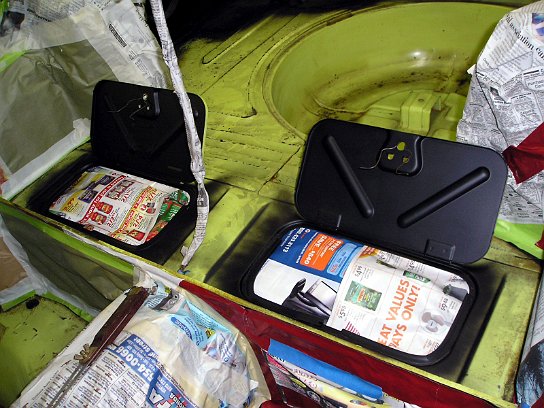
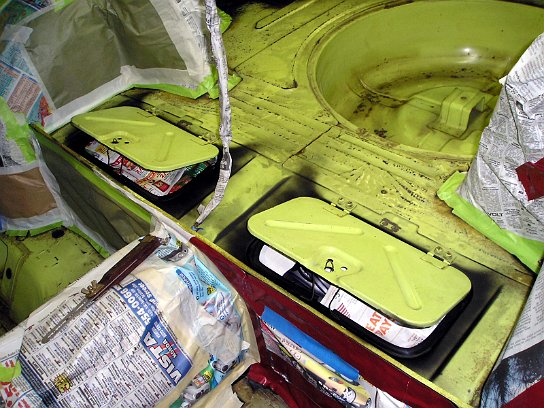
 Spare Tire2November 16, 2003 11:35 PM
Yepper it's a spare alright..., and in case you forget it will tell ya so! LOL!
-
 Spare TireNovember 16, 2003 11:35 PM
I've never actually seen a car tire that is shaped like a motorcycle tire..guess there's a first for everything though.
-
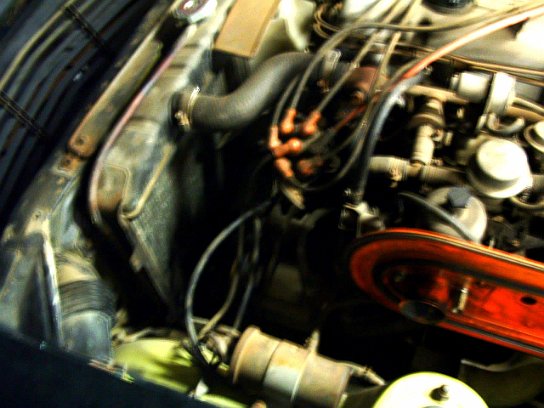
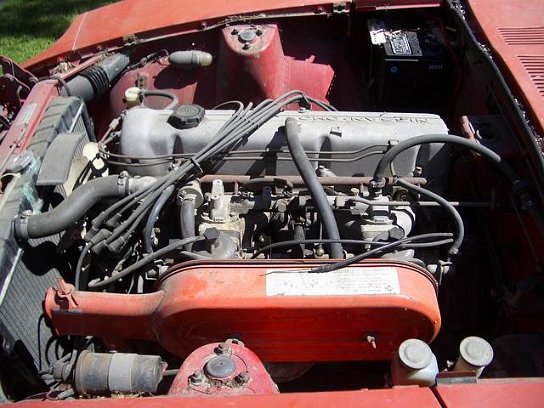
 Enginebay November03 002June 13, 2002 3:18 AM
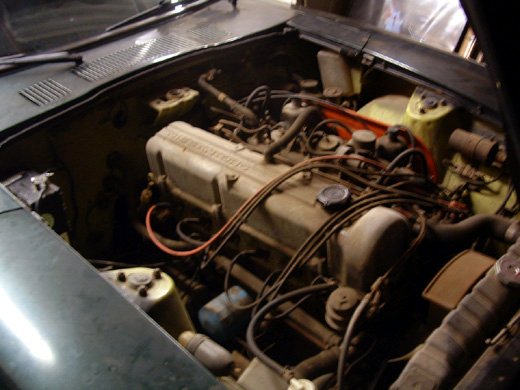
it looks much better now...I swear!! ..lol ;)
-
 Picture 004_editedJune 13, 2002 3:18 AM
 -
 Enginebay November03June 13, 2002 3:18 AM
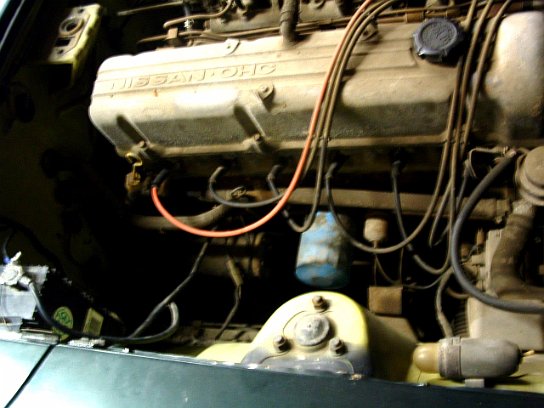
All that smog craps gotta go!...man I can't believe it used to look like this...ugggLY!
-
 Picture 005_editedJune 13, 2002 3:19 AM
 -
 Picture 006_editedJune 13, 2002 3:19 AM
 -
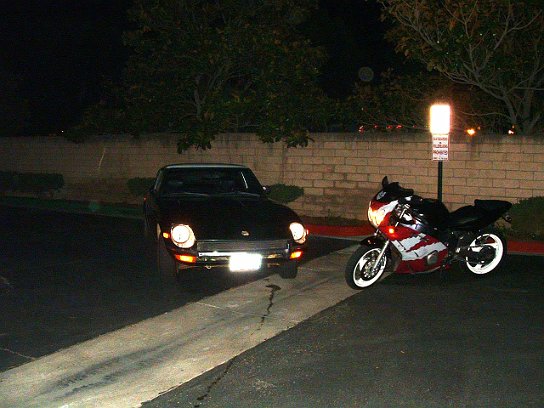
 Picture 010_editedJune 16, 2002 4:22 AM
Both my babies, the bike I've since givin up for adoption but still miss it time to time.
-
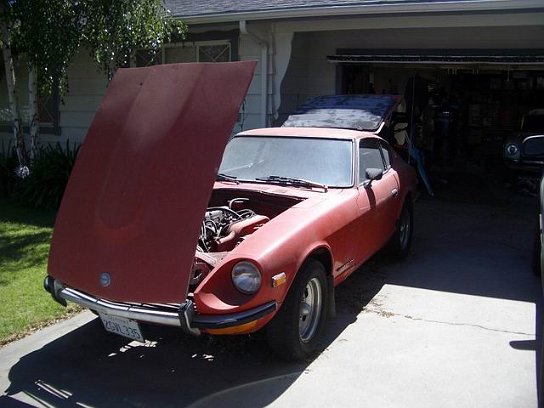
 red 05July 25, 2004 3:33 PM
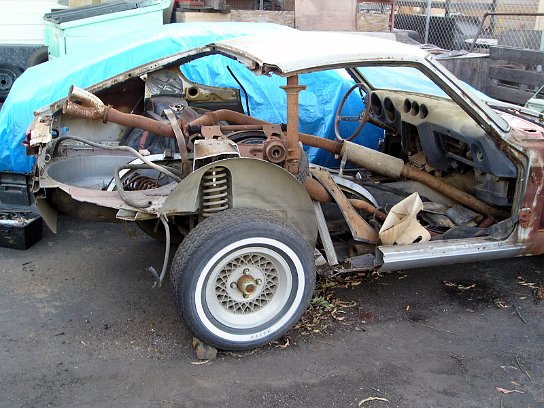
$ FREE! $ ...I can't remember how I stumbled onto these but I scored these two Zs for free, zip, zero, nada, nothing. This guy is awesome and definately did his good deed for the decade! Thank you!
-
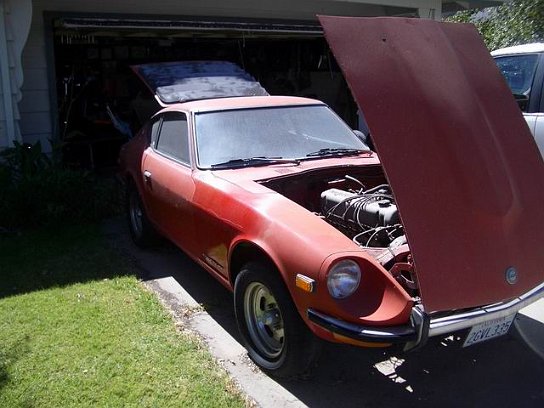
 red 06July 25, 2004 3:33 PM
Just more angles..
-
 red 03July 25, 2004 3:33 PM
Now the inside of course is stripped but I still snagged quite a few parts from it for my Z
-
 red 01July 25, 2004 3:32 PM
 -
 red 02July 25, 2004 3:32 PM
 -
 red 04July 25, 2004 3:33 PM
This engine I wound up going to a friend along with the other white Z seen in later photos.
-
 red 07July 25, 2004 3:34 PM
Never tried it but supposed to be in running condition, so hopefully still will called into use.
-
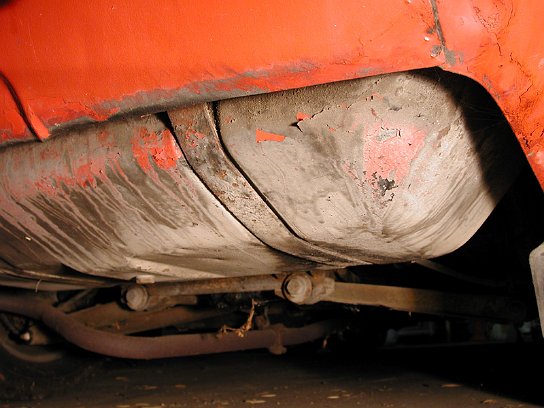
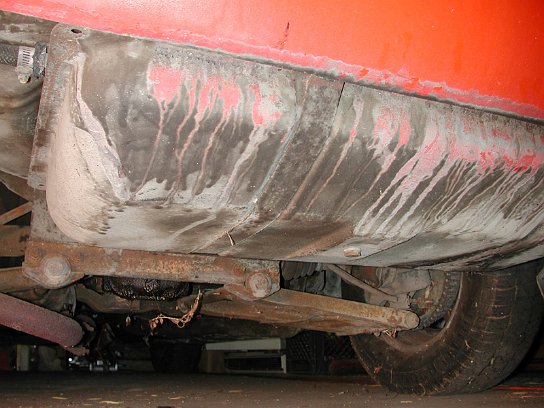
 Gastank 003November 30, 0002 12:00 AM
This will replace the dented tank on mine.
-
 Gastank 002November 30, 0002 12:00 AM
Seems ok and no visible dents.
-
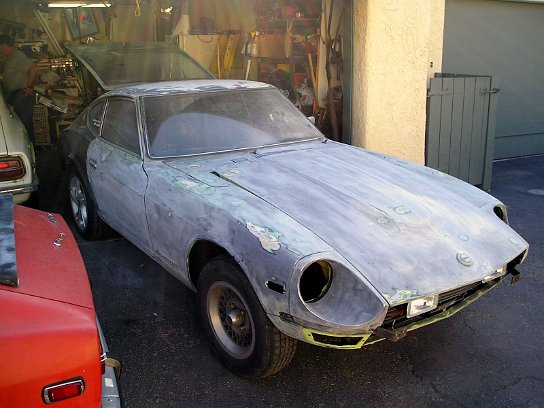
 white 01July 25, 2004 3:29 PM
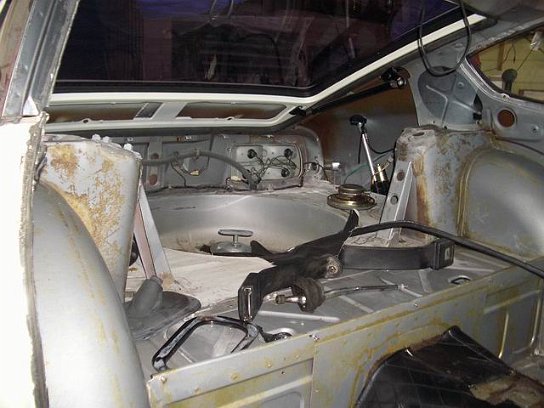
Here's the other Z we got for free and in turn also gave to a friend for free when my dad figured out he didn't have enough time to finish it.
-
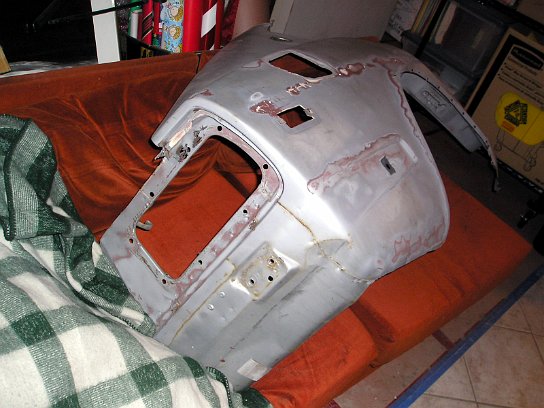
 white 06July 25, 2004 3:31 PM
A few scuffs and dents but a pretty sound body.
-
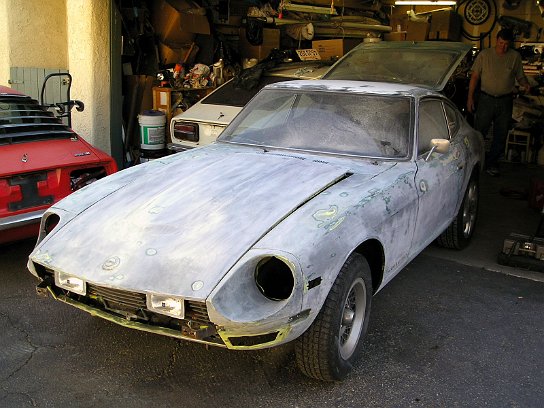
 white 04July 25, 2004 3:31 PM
 -
 white 02July 25, 2004 3:30 PM
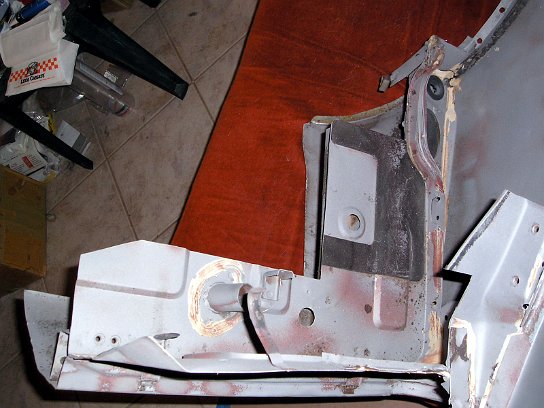
Well with the exception of the floorboard but a new floorboard came with it if I remember right.
-
 white 03July 25, 2004 3:30 PM
Alot of work needed though as you can see by the lack of interior.
-
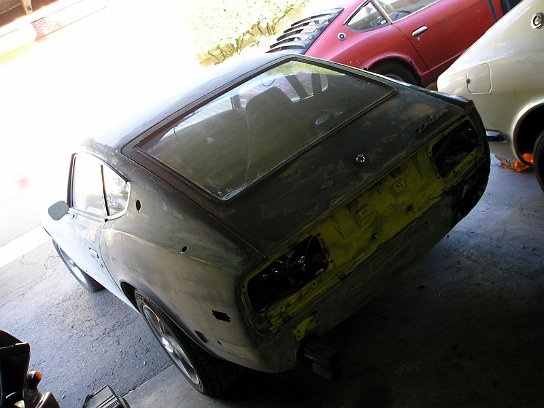
 white 05July 25, 2004 3:31 PM
A little rust in the bay that will need attention.
-
 white hoodJuly 25, 2004 3:35 PM
Shot of the hood.
-
 extra partsJuly 25, 2004 3:35 PM
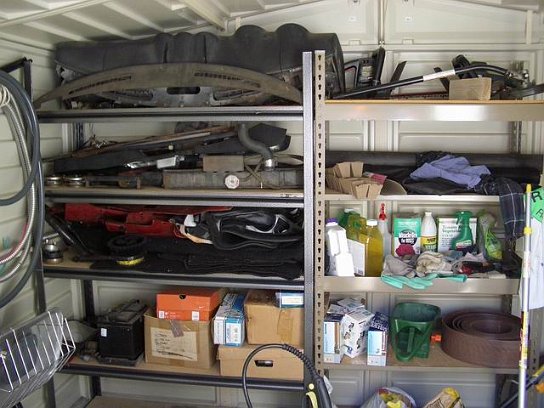
Parts that go with them.
-
 urethane_bushing_kitJuly 25, 2004 9:22 PM
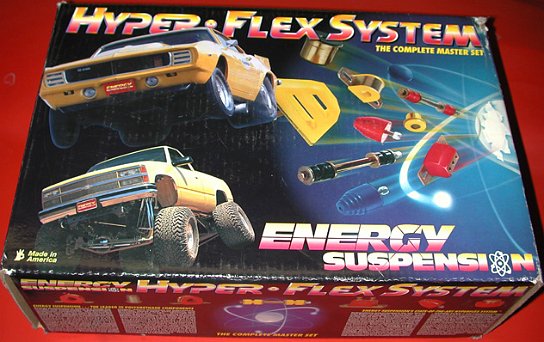
Awesome...this kit's like $300 if purchased!
-
 White240 001July 1, 2005 6:53 PM
In back of the garage.
-
 White240 002July 1, 2005 6:53 PM
 -
 04_11_2004 Polished1February 28, 2004 3:57 PM
No more white roof. Just polished.
-
 04_11_2004 Polished2February 28, 2004 3:26 PM
Not bad for $800, some elbow grease, and two cans of green spray paint for the roof.
-
 Pt Mugu3 Edited 1030x642November 30, 0002 12:00 AM
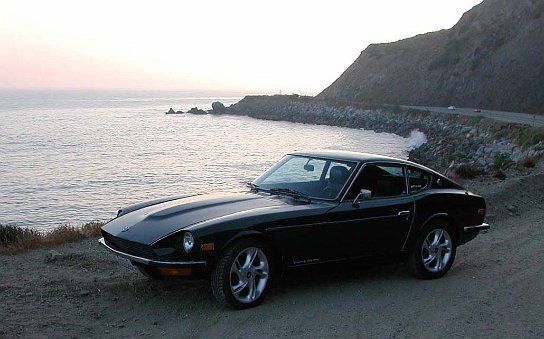
PCH in Malibu, CA
-
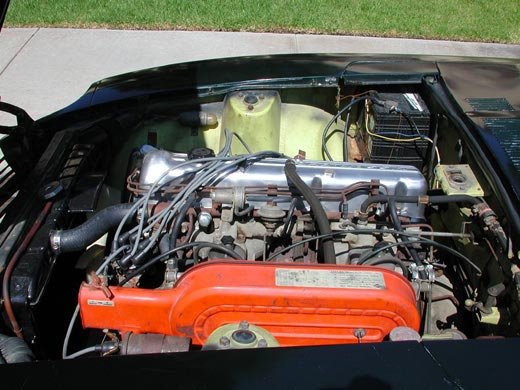
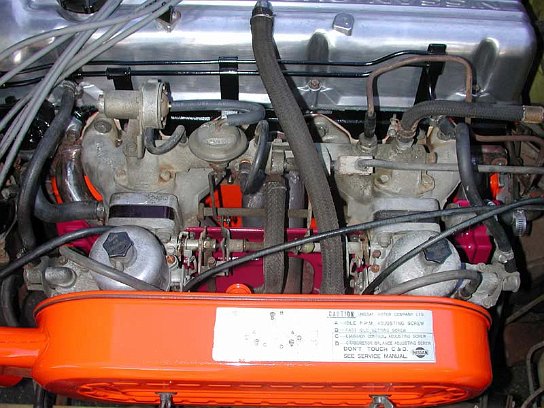
 240Z Enginebay July04 001 resizedNovember 30, 0002 12:00 AM
Shiny newly polished valve cover and removal of unecessary smog crap.
-
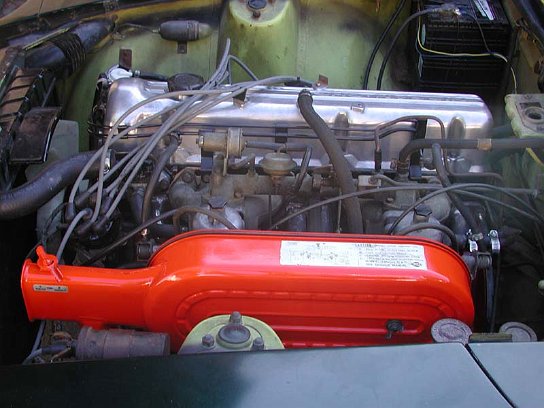
 Engine July 24 2004 006November 30, 0002 12:00 AM
Painted the airbox. Much better.
-
 240Z Enginebay July04 003 resizedNovember 30, 0002 12:00 AM
Amazing what the minor details can do.
-
 240Z Enginebay July04 002November 30, 0002 12:00 AM
Those need to go..lol
-
 Engine 006 resizedNovember 30, 0002 12:00 AM
This needs to be cleaned up, wouldn't you say ?
-
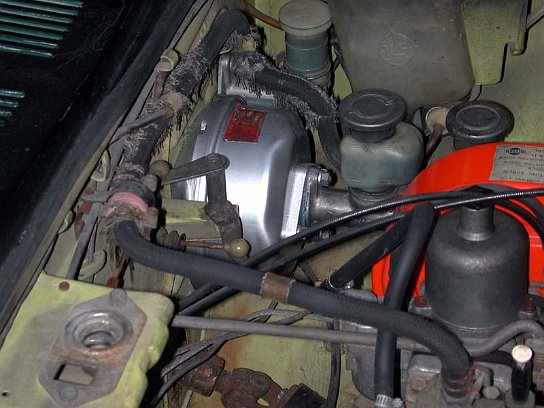
 BrakeBooster2November 30, 0002 12:00 AM
Better, no ? lol
-
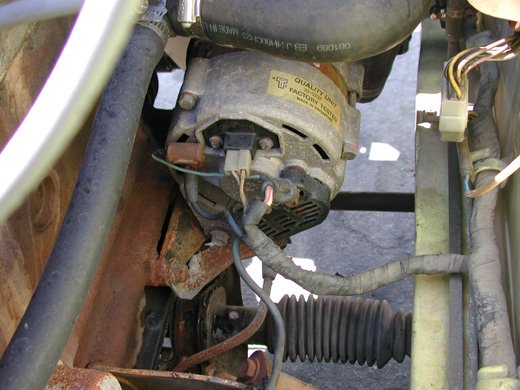
 240Z Enginebay July04 004 resizedApril 1, 2004 1:35 PM
This alternator could use a bit of cleaning too
-
 Engine 002 resizedNovember 30, 0002 12:00 AM
Awe yes, the head gasket...yay..lol
-
 Engine 003 resizedNovember 30, 0002 12:00 AM
What a PIA, hope I don't have to do this too many times!
-
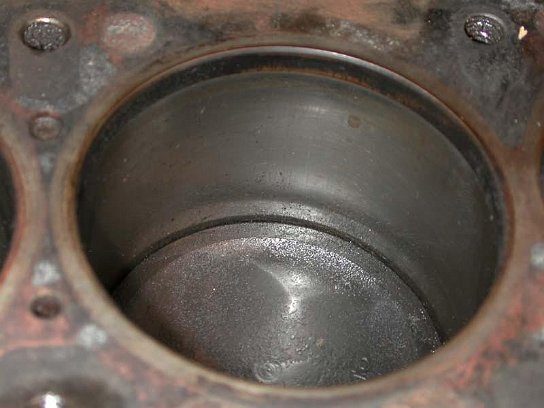
 Engine 004 resizedNovember 30, 0002 12:00 AM
Close up of the cylinder walls.
-
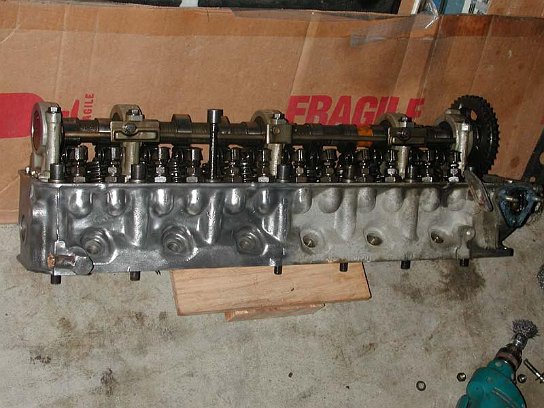
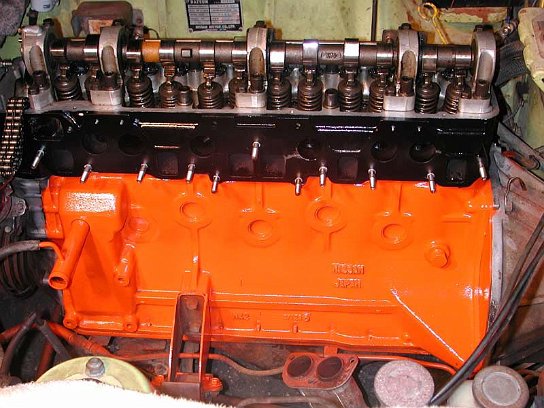
 Engine-Head 001 resizedNovember 30, 0002 12:00 AM
Before and after wire brushing. I think I should've just put a quick clear on instead of painting it black..oh well...next time. What a difference though.
-
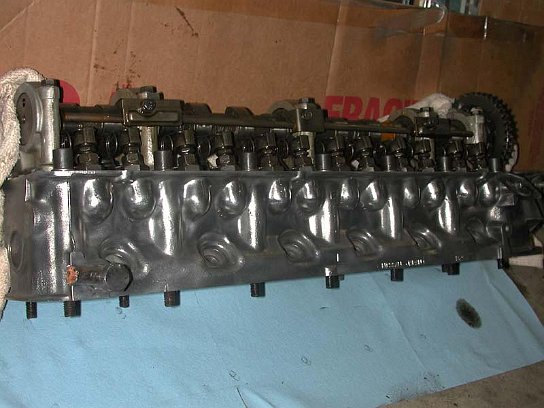
 Engine-Head 005 resizedNovember 30, 0002 12:00 AM
All clean
-
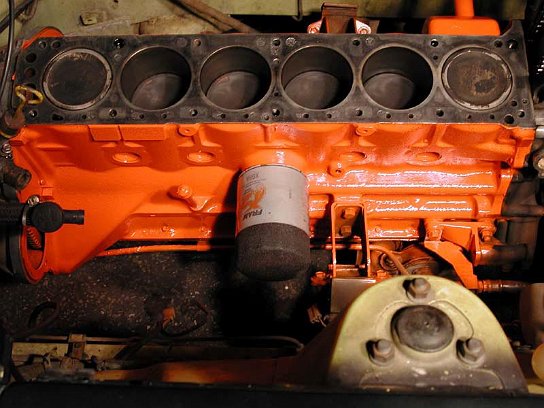
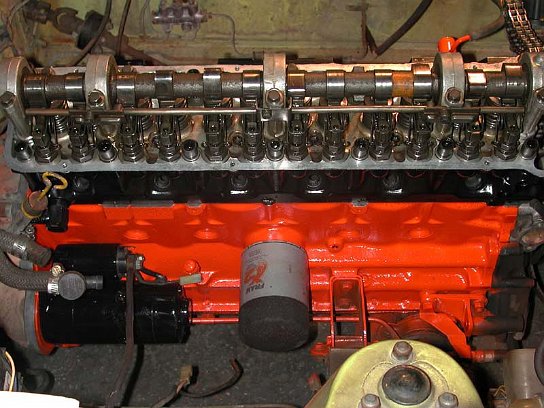
 Engine-Painted 001 resizedNovember 30, 0002 12:00 AM
Ok I know...chevy orange on a datsun might just seem a bit off but in my opinion it's 100x better than rust colored haha
-
 Engine-Painted 002 resizedNovember 30, 0002 12:00 AM
Just did a real quick paint job, obviously as you can tell by my excellent masking prep lol.
-
 Engine July 24 2004 004 resizedNovember 30, 0002 12:00 AM
Still though...not bad. Starter painted too.
-
 Engine July 24 2004 002 resizedNovember 30, 0002 12:00 AM
Just another angle in different light.
-
 Engine July 24 2004 008 resizedNovember 30, 0002 12:00 AM
Alright the metallic red thing was not my best choice but again better than rust!
-
 Engine July 24 2004 010 resizedNovember 30, 0002 12:00 AM
Starting to look better in here, much cleaner, and a new starter and cleaned up alternator.
-
 VRNovember 30, 0002 12:00 AM
A better shot of the alternator. Had I known it would crap out in a few months I wouldn't have bothered lol.
-
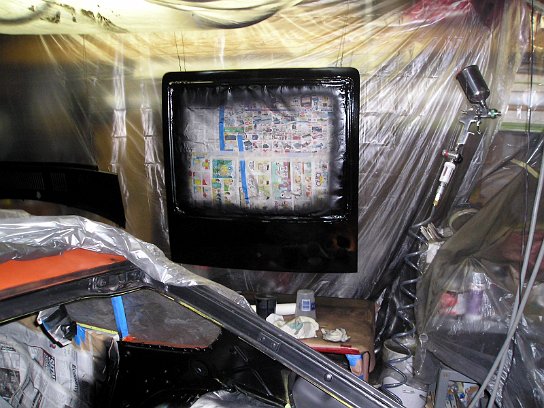
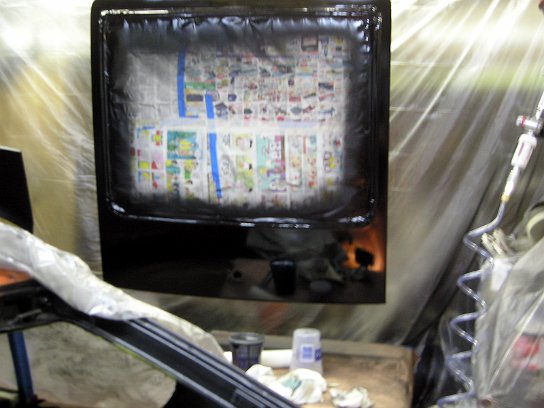
 PISSINGNovember 30, 0002 12:00 AM
It has begun, auto to manual conversion.
-
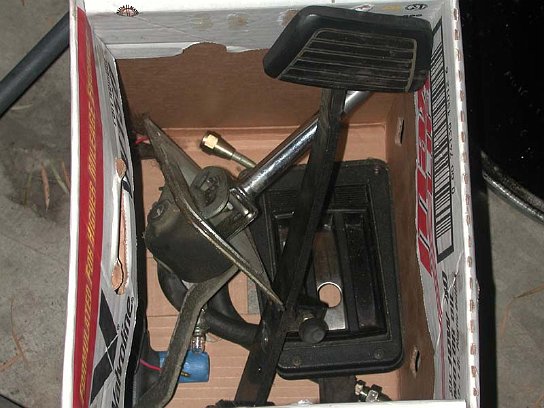
 auto boxNovember 30, 0002 12:00 AM
Wont be needing these anymore :)
-
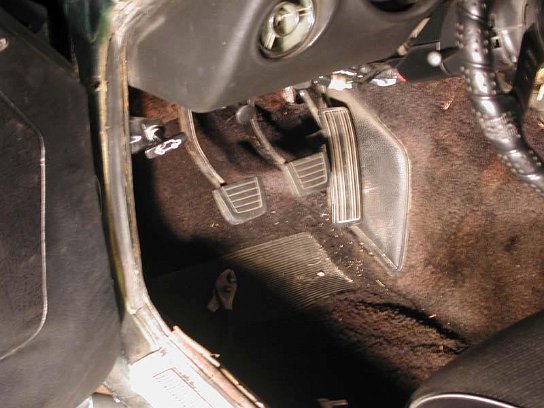
 PEDALSNovember 30, 0002 12:00 AM
This was probably the easiest part of the swap, just bolts right in and takes maybe 5 minutes. Love seeing 3 pedals there!
-
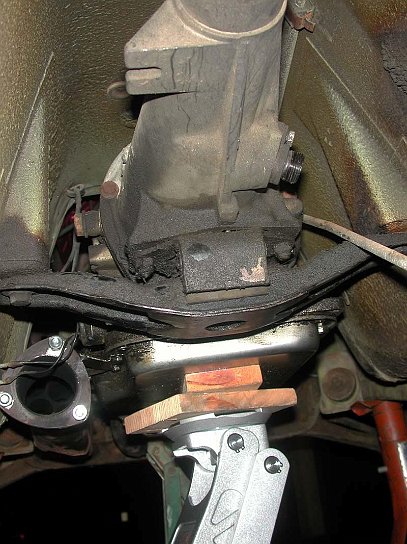
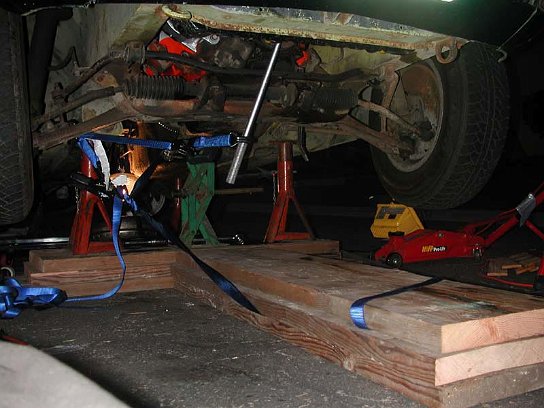
 supported trannyNovember 30, 0002 12:00 AM
Tranny supported. Getting ready to drop it.
-
 tranny bracketNovember 30, 0002 12:00 AM
Talk about close I thought I was going to have to remove the header to get the dang tranny out but then I noticed the 2 bolts haha.
-
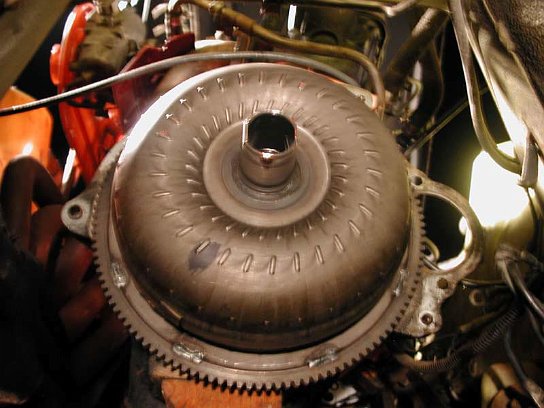
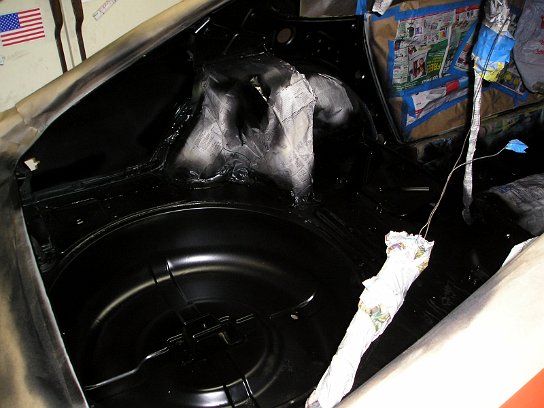
 torque converterNovember 30, 0002 12:00 AM
Yay! Weight reduction, time for that big heavy converter to come off!
-
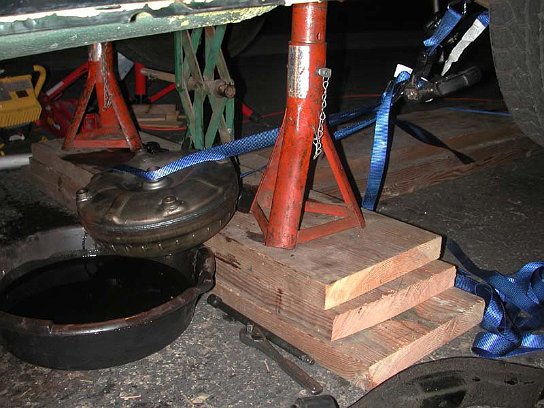
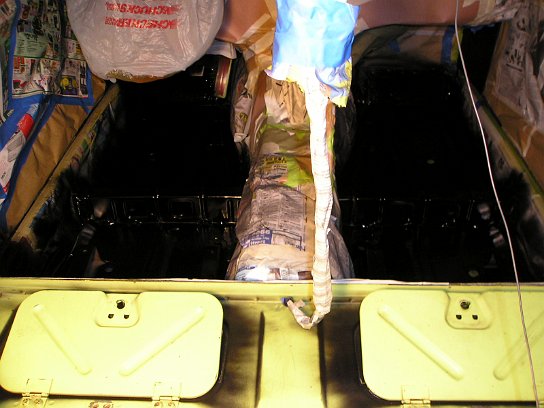
 jimmy rigNovember 30, 0002 12:00 AM
Well..I sure as heck wasn't going to hold it until all the fluid was out lol.
-
 jimmy rig2November 30, 0002 12:00 AM
Normally I'd just use the ground to hold the crank still while I removed the flywheel bolts or an air wrench. However past 9PM and jacked up adds complexity to the situation so a little designing was needed.
-
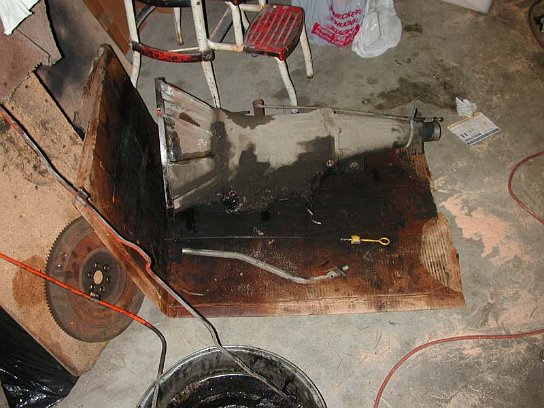
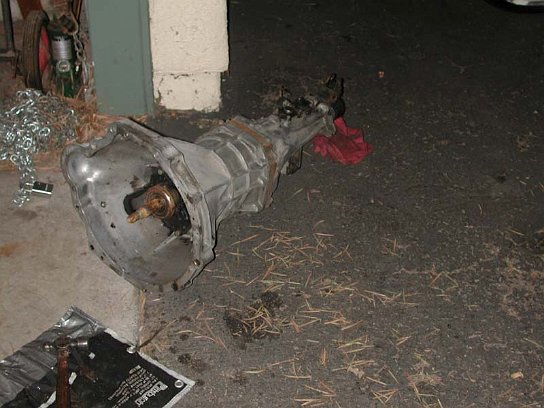
 Auto trannyNovember 30, 0002 12:00 AM
Good riddens!
-
 diff yokeJuly 27, 2004 12:36 PM
The manual requires a different driveshaft so it goes too.
-
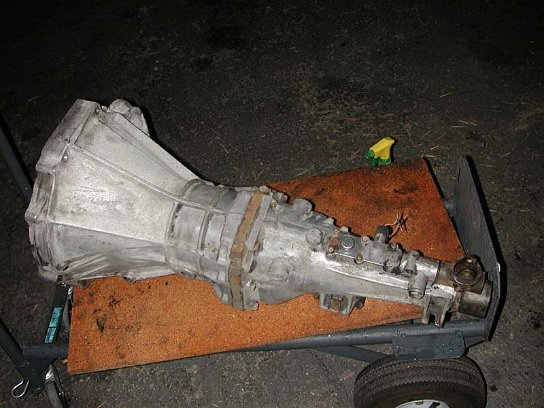
 4SPDJuly 27, 2004 12:34 PM
Another shot of the 4sod.
-
 4-spd tranny July 24 2004 027July 27, 2004 12:34 PM
A shot of the 4spd tranny to replace the auto. This was later replaced again with a 5spd ZX tranny.
-
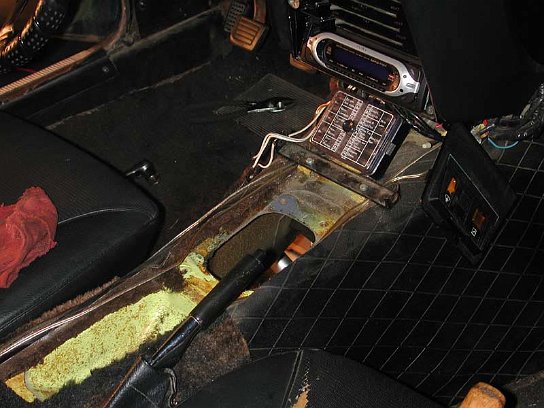
 consol uncutNovember 30, 0002 12:00 AM
The hole for the shifter needs to get cut out to accomodate the new transmission.
-
 sheet metalNovember 30, 0002 12:00 AM
...and presto...like a glove lol
-
 Datsun 002November 30, 0002 12:00 AM
next day with transmission installed
-
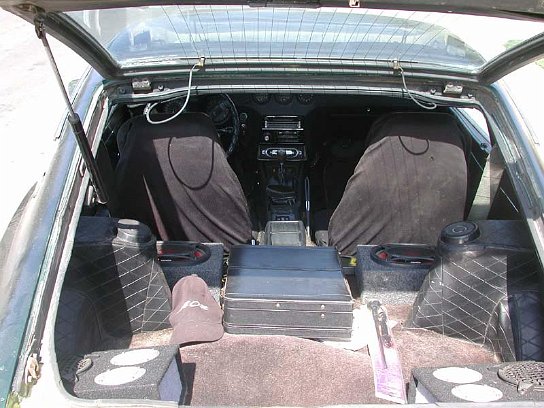
 Datsun 004November 30, 0002 12:00 AM
A view from the rear.
-
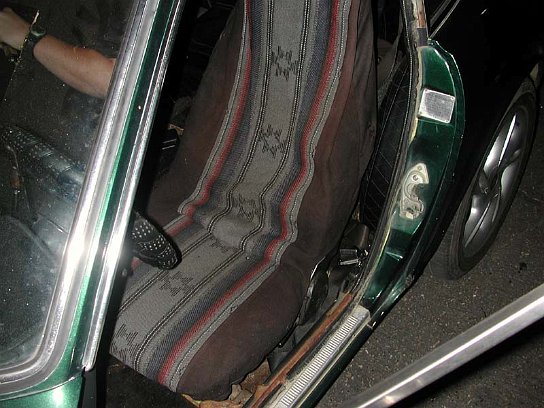
 SEATJuly 28, 2004 12:35 AM
Newly installed seat covers, maybe I wont stick to these haha
-
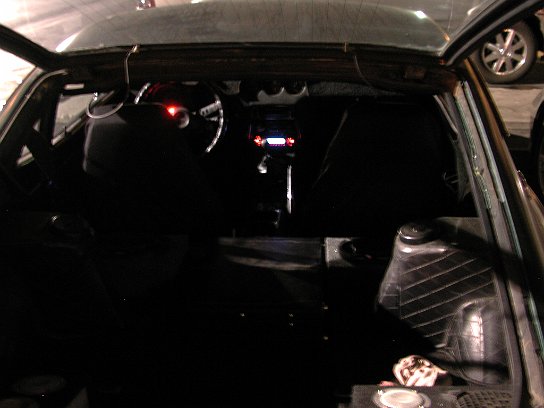
 Car Interior2July 29, 2004 12:35 PM
Just a shot of my new sterio at night. Nothing too fancy.
-
 Datsun 006July 31, 2004 12:35 PM
Really miss having all 4 wheels matching, my brand new project found on the home page came with matching sets...woohoo! :)
-
 Picture002
got-z.com This was (keyword there) an awesome forum but not anymore unfortunately.
-
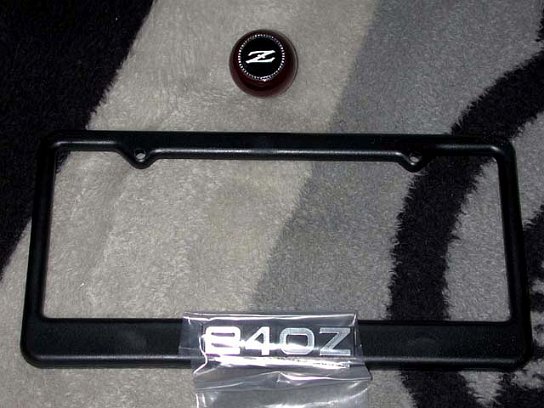
 Secret_Santa_Gift_2004_smallNovember 30, 0002 12:00 AM
a gift from secret santa at got-z.com :) You know who you are and thank you!
-
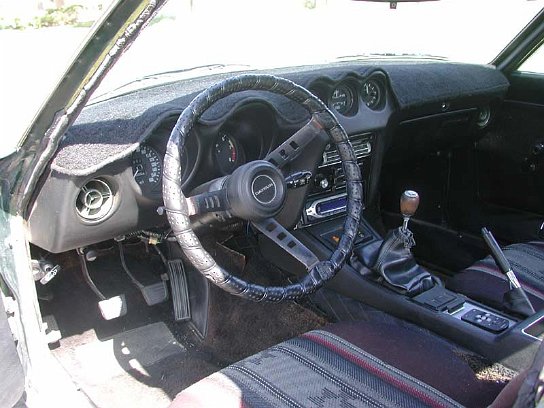
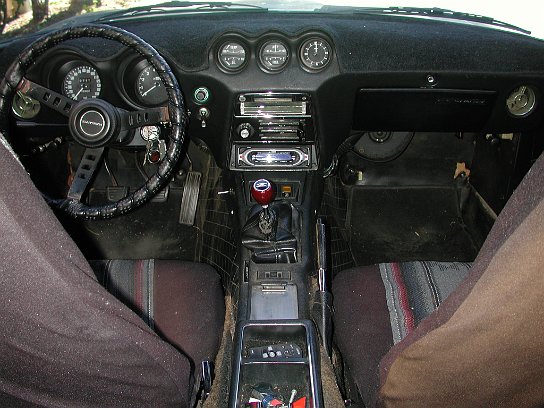
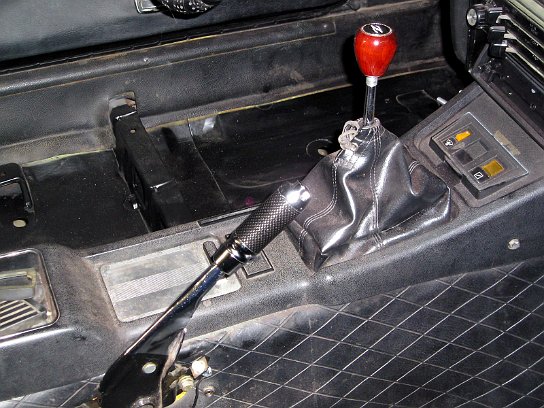
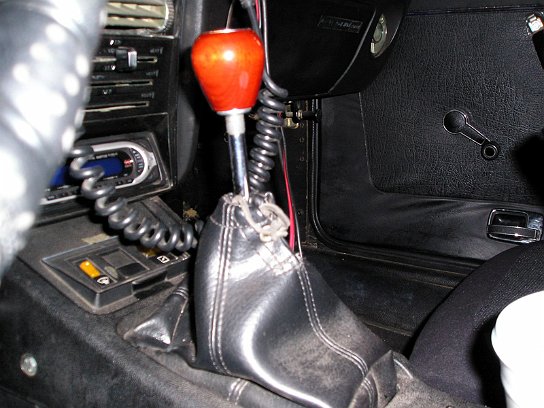
 car interior dec04December 26, 2004 2:00 PM
New shifter installed.
-
 TTozzzed Front Sept 30 04 003November 30, 0002 12:00 AM
Doh! darn neons anyway...my fault but I thought after starting to go for the 3rd time at the stop sign he was gonna go and I started checking for traffic as I moved up then...bump..doh!
-
 TTozzzed Front Sept 30 04 001November 30, 0002 12:00 AM
From the top.
-
 TTozzzed Front Sept 30 04 004November 30, 0002 12:00 AM
Yeah that's not a flare job lol it's a push job hahaha not supposed to be.
-
 TTozzzed Front Sept 30 04 006November 30, 0002 12:00 AM
From this shot you can see the bumper got shoved into the fender.
-
 TTozzzed Front Sept 30 04 008November 30, 0002 12:00 AM
Another angle, bumper will have to be replaced, the hood I can fix.
-
 Exhuast-patch 002September 10, 2005 4:25 PM
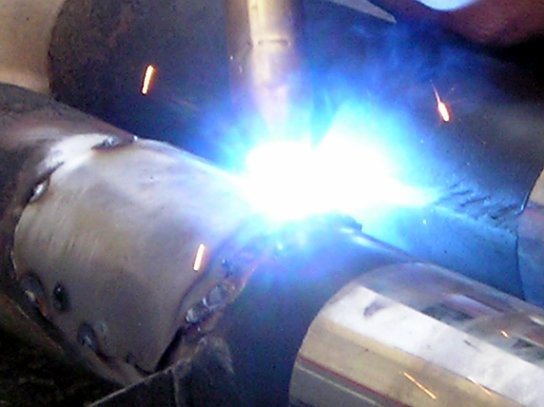
patching the new exhaust mufflers, they make it sound like an old school Ferrari :)
-
 Shotgun exhaust 001November 30, 0002 12:00 AM
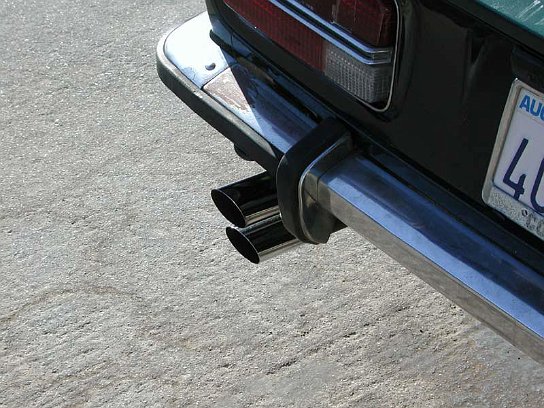
New shotgun style exhaust installed.
-
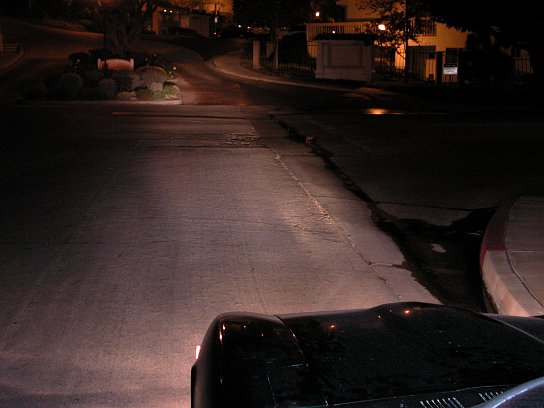
 headlight1December 8, 2004 11:00 PM
My new hellas..
-
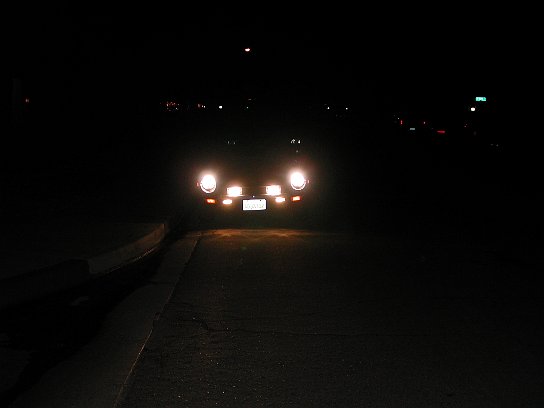
 headlight2December 8, 2004 11:00 PM
In normal mode.
-
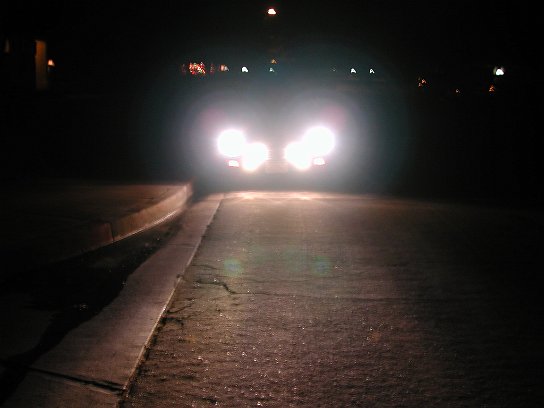
 headlight3December 8, 2004 11:00 PM
I believe this was without flash in night mode or I just turned on the brights lol...whatever the case it came out way brightermuch brighter
-
 Crash1 016February 19, 2005 10:29 AM
This is what driving too fast for the conditions and bald rear tires can get you..
-
 Crash2_017February 19, 2005 10:29 AM
Almost caught it 4 times before it finally whipped around too fast for me to react...oh well...that's what I get.
-
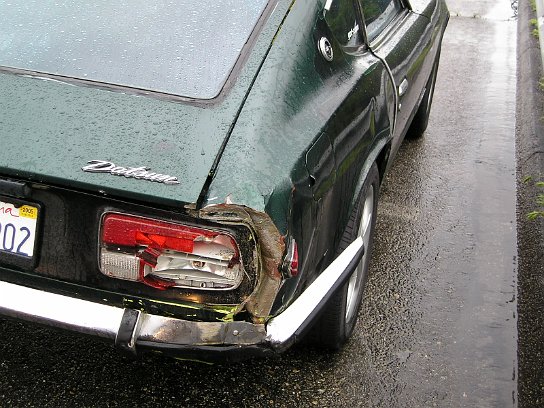
 Crash3 018February 19, 2005 12:43 PM
Couldn't get the passenger door open for quite sometime afterwards. You can see the overlap in this photo where the rear quarter meets the door.
-
 Crash4 019February 19, 2005 12:43 PM
Close up.
-
 Crash5 020February 19, 2005 7:02 PM
Later that night installed a new tail light to avoid tickets.
-
 Crash6 021February 19, 2005 7:02 PM
From further back. I also tookl the broken appendage off (aka the bumper which was just hanging on the right side)
-
 Keys 001March 14, 2005 5:48 PM
My Z key fob.
-
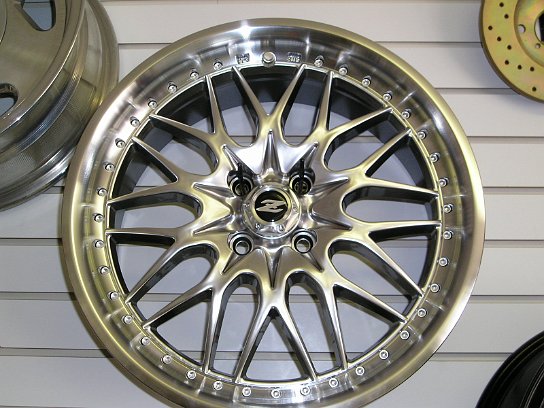
 Konig 17in Datsun Wheels MSAFebruary 28, 2005 3:47 PM
I still like these wheels and someday I will have a set of tires mounted on my Z with them. This was taken at MSA.
-
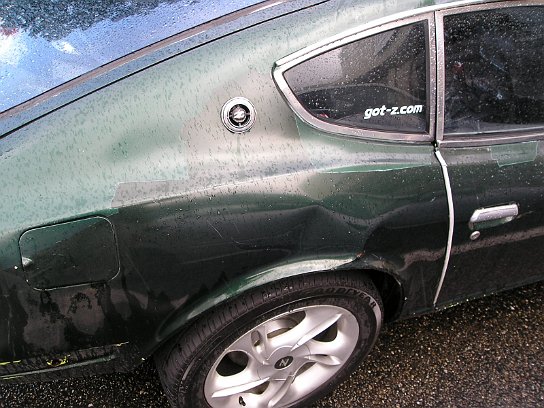
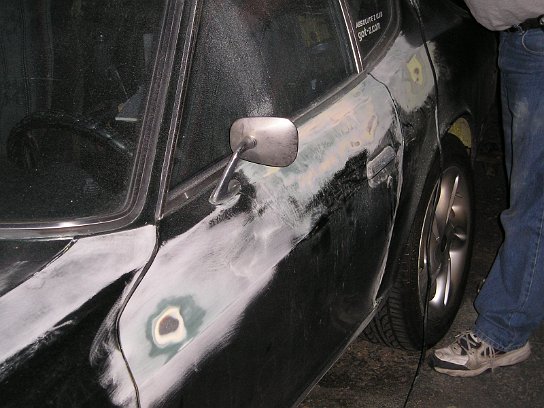
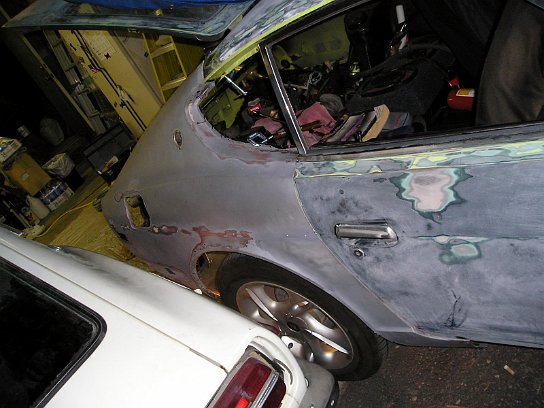
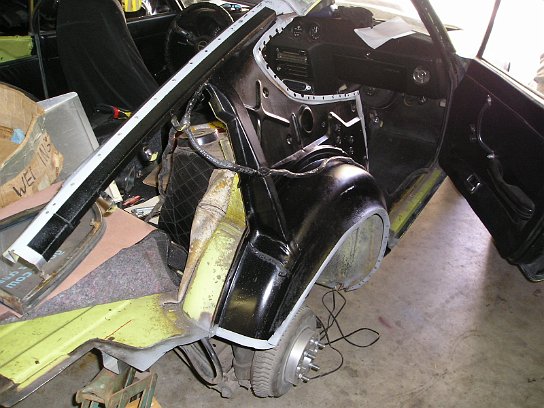
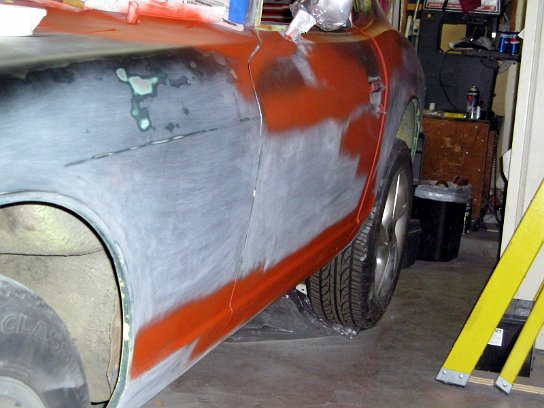
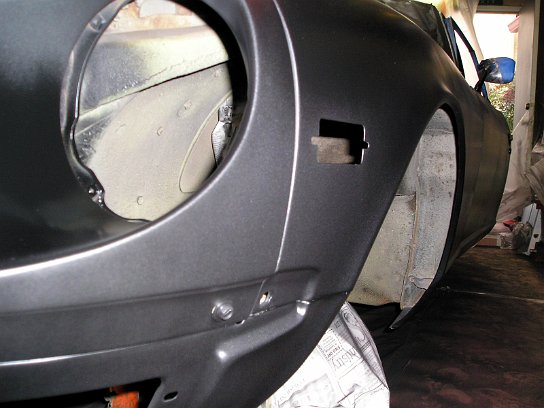
 Quarter_and_Paint_Project 001April 21, 2005 12:56 PM
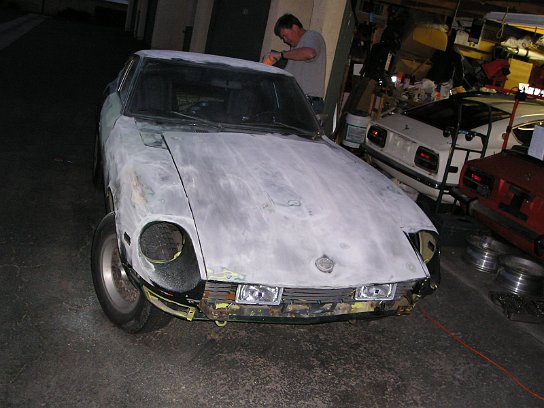
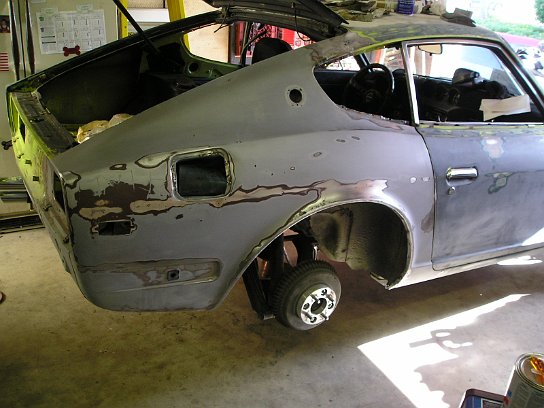
It has begun. Question is will it finish ? lol
-
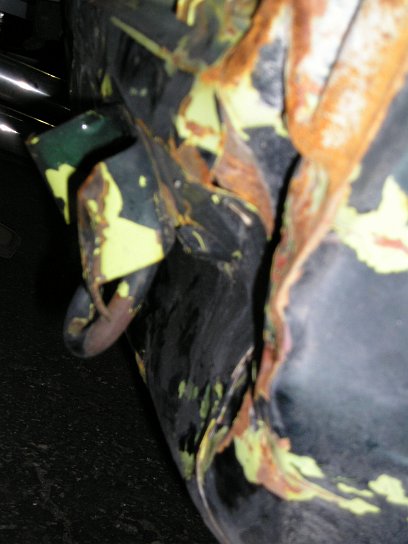
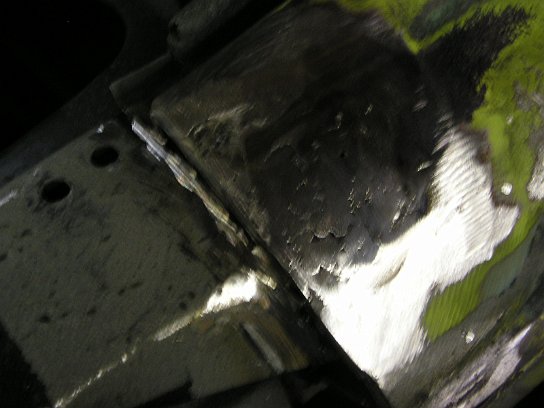
 Quarter_and_Paint_Project 003April 21, 2005 6:40 PM
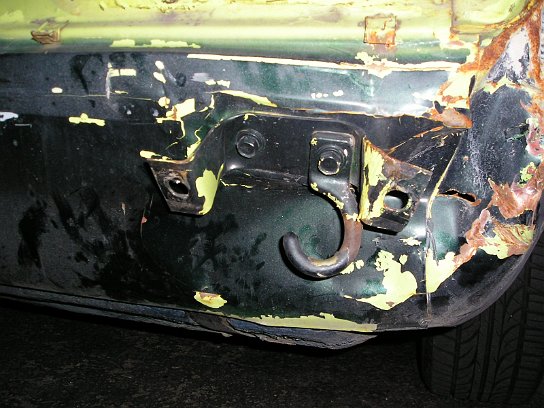
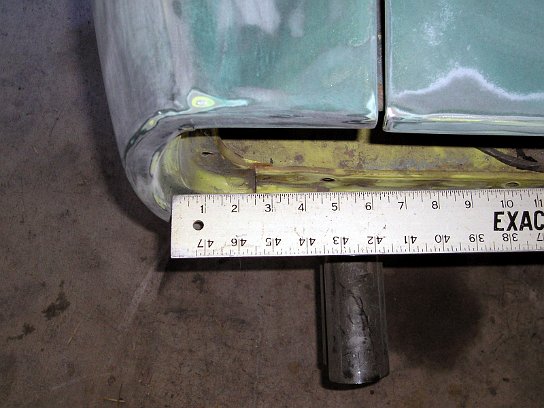
This angle shows how creased it is. No pulling that out. It's gotta come off.
-
 Quarter_and_Paint_Project 002April 21, 2005 6:39 PM
Another angle.....didn't need that tow hook anyway
-
 Quarter_and_Paint_Project 005April 21, 2005 6:41 PM
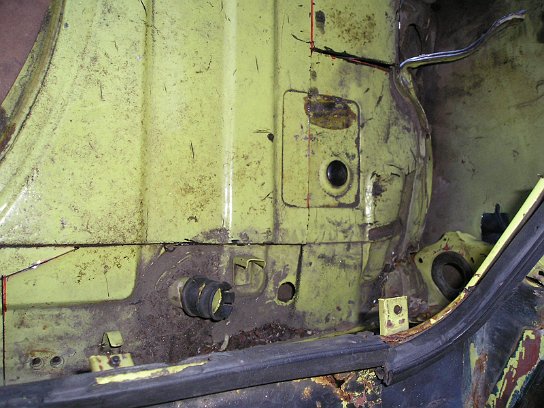
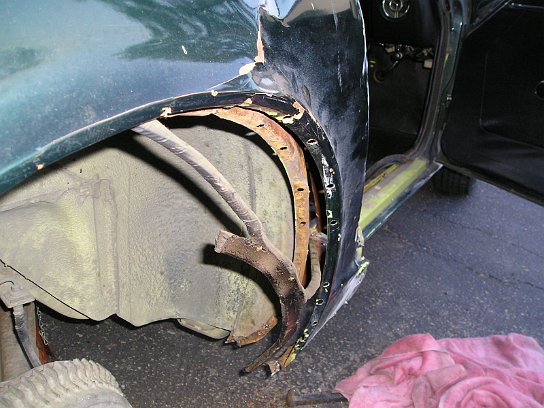
From the inside.
-
 Quarter_and_Paint_Project 006April 21, 2005 6:41 PM
Again from the outside.
-
 Quarter_and_Paint_Project 007April 21, 2005 6:41 PM
Another view of the creases.
-
 Quarter_and_Paint_Project 008April 21, 2005 6:43 PM
Initial sanding down, first phase of the project.
-
 Quarter_and_Paint_Project 009April 21, 2005 6:44 PM
 -
 Quarter_and_Paint_Project 010April 21, 2005 6:44 PM
 -
 Quarter_and_Paint_Project 012April 22, 2005 4:50 PM
3 peas in a pod, lol 3+ car garages leave me envious at times.
-
 Quarter_and_Paint_Project 011April 22, 2005 4:49 PM
In case you're wondering. That's my dad in the background helping out
-
 Quarter_and_Paint_Project 013April 22, 2005 4:50 PM
OLYMPUS DIGITAL CAMERA
-
 Quarter_and_Paint_Project 014April 22, 2005 4:51 PM
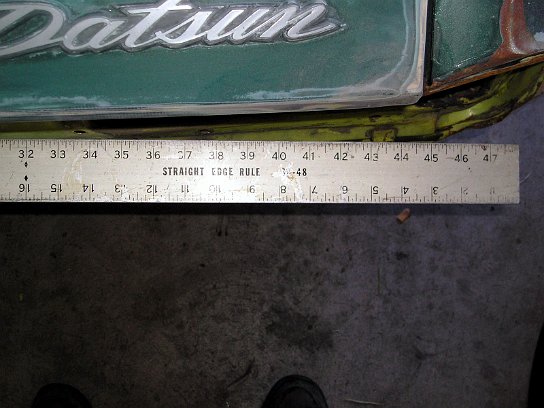
Take a look at the spacing compared to the straight edge in this shot.
-
 Quarter_and_Paint_Project 015April 22, 2005 4:51 PM
A tad different. lol
-
 Quarter_and_Paint_Project 016April 29, 2005 5:48 PM
This is the carcus I cut my replacement quarter panel from.
-
 Quarter_and_Paint_Project 018April 29, 2005 5:49 PM
A few shots of the replacement panel.
-
 Quarter_and_Paint_Project 019April 29, 2005 5:49 PM
OLYMPUS DIGITAL CAMERA
-
 Quarter_and_Paint_Project 020April 29, 2005 5:49 PM
OLYMPUS DIGITAL CAMERA
-
 Quarter_and_Paint_Project 027May 3, 2005 6:25 PM
Hope I cut this right..lol
-
 Quarter_and_Paint_Project 028May 3, 2005 6:25 PM
A closer angle.
-
 Quarter_and_Paint_Project 022May 3, 2005 6:19 PM
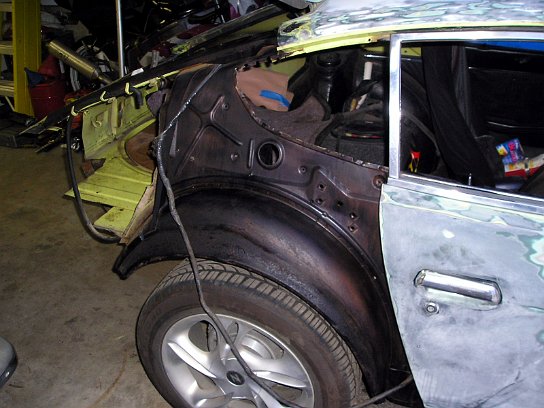
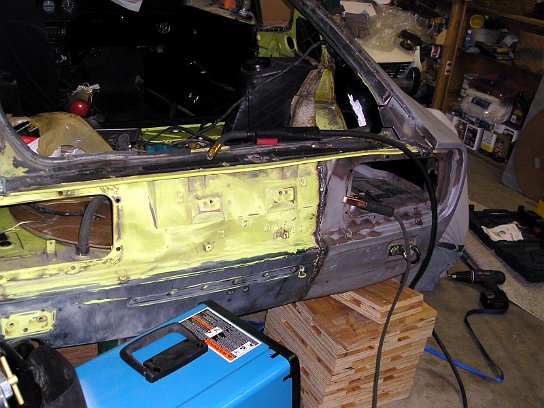
No turning back now.
-
 Quarter_and_Paint_Project 023May 3, 2005 6:19 PM
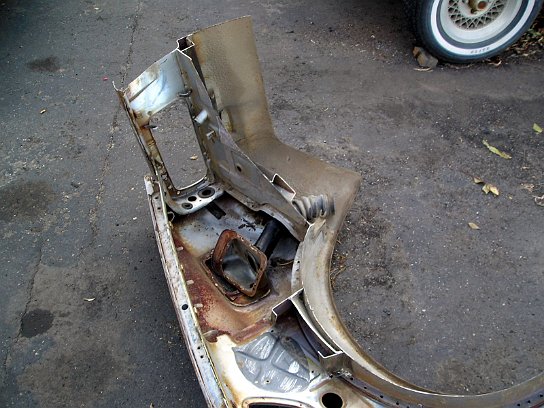
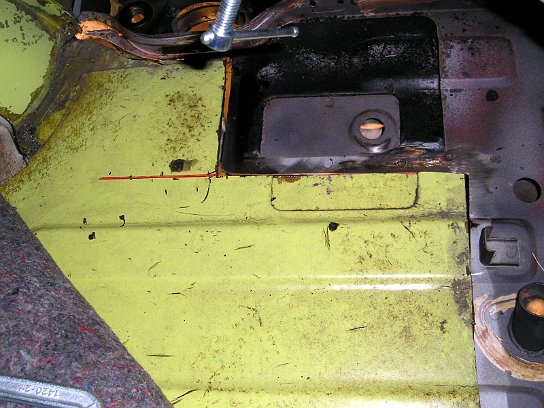
Upper frame rail cut at original factory seam.
-
 Quarter_and_Paint_Project 024May 3, 2005 6:19 PM
...and a crap ton of rivets to drill out
-
 Quarter_and_Paint_Project 025May 3, 2005 6:20 PM
more rivets.
-
 Quarter_and_Paint_Project 026May 3, 2005 6:20 PM
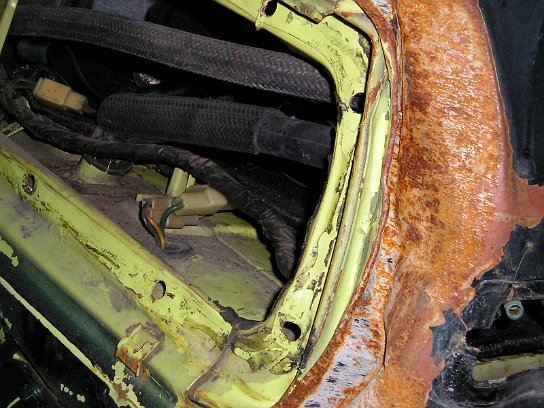
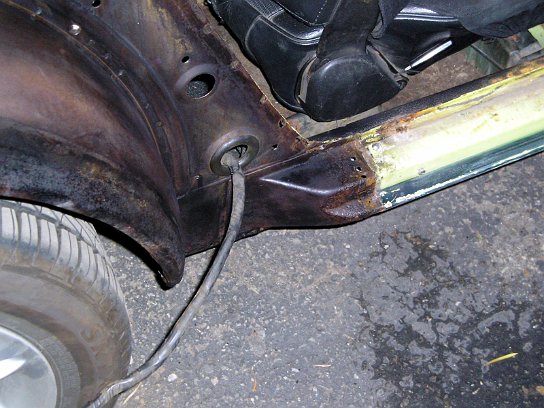
mental note, electrical runs through here. I'm glad we didn't accidentally cut through it.
-
 Quarter_and_Paint_Project 029May 3, 2005 6:27 PM
 -
 Quarter_and_Paint_Project 030May 3, 2005 6:35 PM
Pretty scary to stop and think that this is your car you just hacked up.
-
 Quarter_and_Paint_Project 031May 3, 2005 6:35 PM
 -
 Quarter_and_Paint_Project 032May 3, 2005 6:35 PM
 -
 Quarter_and_Paint_Project 033May 3, 2005 6:35 PM
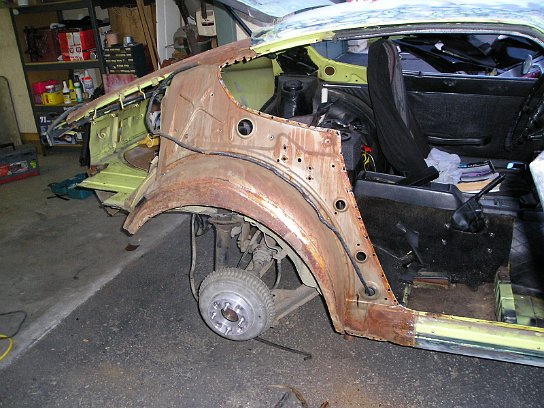
well at least I can sand and repaint the inner wall.
-
 Quarter_and_Paint_Project 034May 3, 2005 7:14 PM
I think all this was a dampner, hard piece of rubber.
-
 Quarter_and_Paint_Project 035May 3, 2005 7:15 PM
OLYMPUS DIGITAL CAMERA
-
 Quarter_and_Paint_Project 036May 5, 2005 5:58 PM
sprayed this with a rust converter/prptector giving it this black color.
-
 Quarter_and_Paint_Project 037May 5, 2005 5:58 PM
OLYMPUS DIGITAL CAMERA
-
 Quarter_and_Paint_Project 038May 5, 2005 7:44 PM
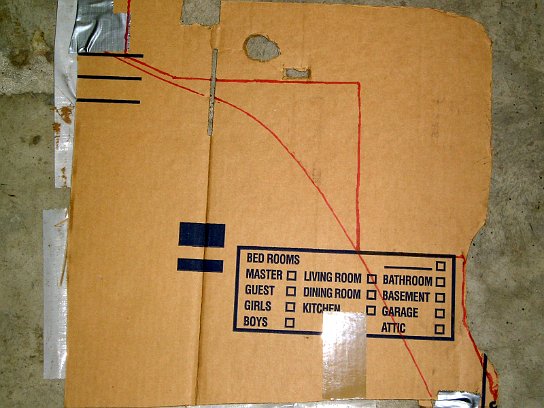
My precut template.
-
 Quarter_and_Paint_Project 040May 5, 2005 11:11 PM
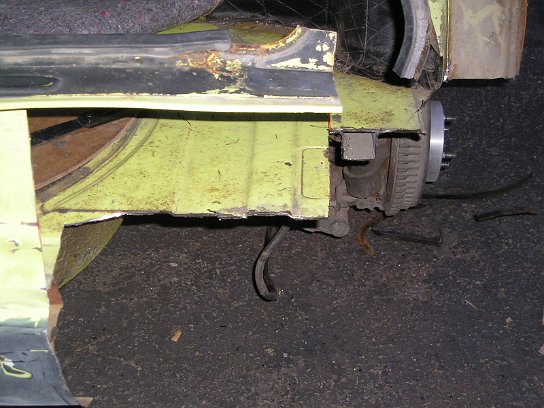
The inner fender well, not needed so we will set this aside.
-
 Quarter_and_Paint_Project 041May 5, 2005 11:11 PM
A bit of sandblasting is required.
-
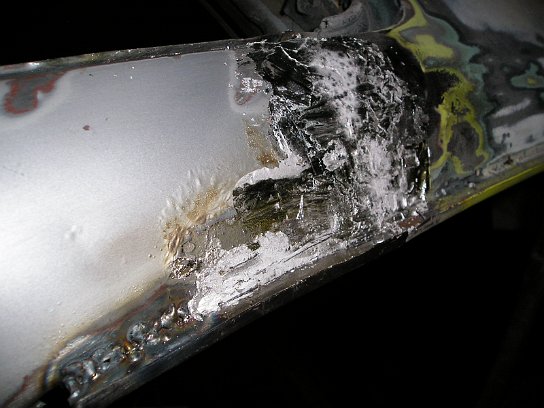
 Quarter_and_Paint_Project 042May 5, 2005 11:14 PM
Just in case you were wondering this is what you'd see if you took the outer layer off.
-
 Quarter_and_Paint_Project 044May 5, 2005 11:17 PM
Hey look a spot I don't have to clean!
-
 Quarter_and_Paint_Project 045May 5, 2005 11:18 PM
Can't say that for the rest of it. Surface rust galore.
-
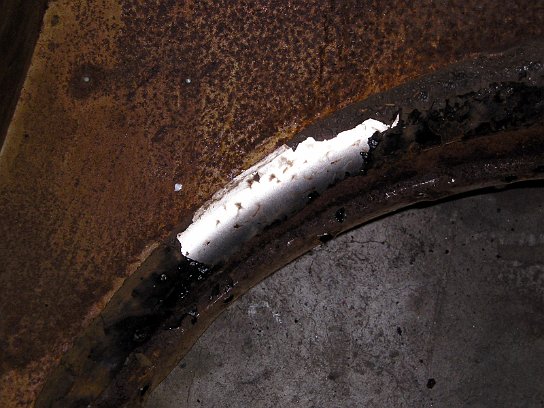
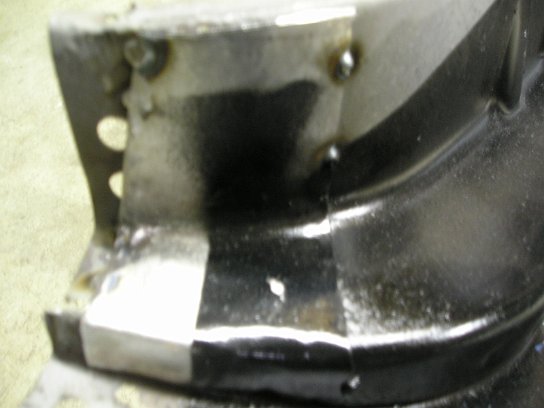
 Quarter_and_Paint_Project 046May 5, 2005 11:20 PM
At somepoint it appears this was repaired before.
-
 Quarter_and_Paint_Project 047May 5, 2005 11:20 PM
Thought at first there was something stuck on it.
-
 Quarter_and_Paint_Project 048May 7, 2005 12:25 AM
First round of sand blasting, tank needs refilling with more sand.
-
 Quarter_and_Paint_Project 056May 8, 2005 1:51 AM
A few hours (at least it felt like it) of sand blasting and it is much better as you can clearly see.
-
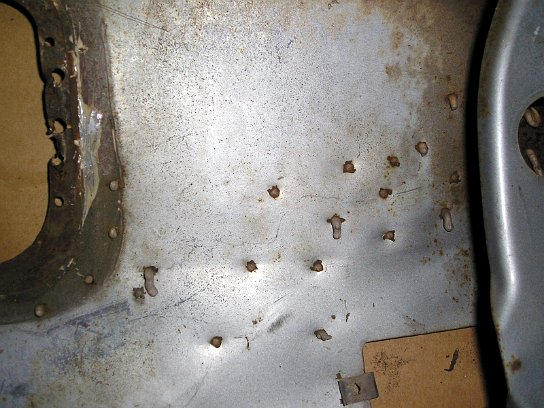
 Quarter_and_Paint_Project 058May 8, 2005 1:54 AM
Sandblasting has left its mark, there are now ares that look like rats found metal appetizing and took some home lol.
-
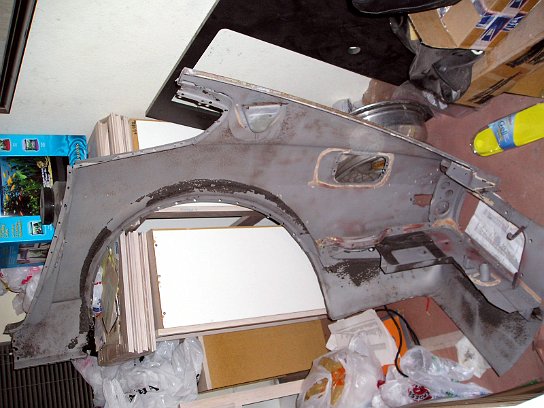
 Quarter_and_Paint_Project 059May 8, 2005 2:01 AM
Who says you can't bring cars into the living room.. ha!
-
 Quarter_and_Paint_Project 061May 8, 2005 2:03 AM
A shot once again showing the inside the little hints of rust that are left I'm just going to use some rust converter on.
-
 Quarter_and_Paint_Project 062May 8, 2005 2:03 AM
OLYMPUS DIGITAL CAMERA
-
 Quarter_and_Paint_Project 063May 8, 2005 2:22 AM
Our trusty sand blaster
-
 Quarter_and_Paint_Project 064May 9, 2005 8:35 PM
A fairly close matchup but needs to be a tad closer.
-
 Quarter_and_Paint_Project 065May 9, 2005 8:35 PM
It's like a jig saw puzzle only in this case you get to make your pieces fit.
-
 Quarter_and_Paint_Project 066May 9, 2005 8:36 PM
Showing the other side not in the previous photo, still have some tweaking to do.
-
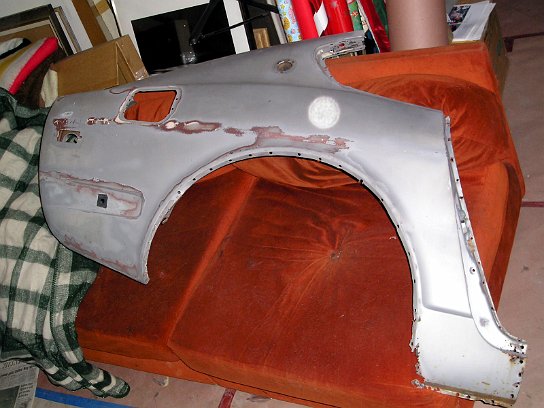
 Quarter_and_Paint_Project 070May 9, 2005 8:40 PM
Starting to look like a car again :)
-
 Quarter_and_Paint_Project 067May 9, 2005 8:42 PM
Just a shot from the rear showing the 2 halves clamped on.
-
 Quarter_and_Paint_Project 068May 9, 2005 8:42 PM
A little closer
-
 Quarter_and_Paint_Project 069May 9, 2005 8:43 PM
Yet another angle.
-
 Quarter_and_Paint_Project 071May 10, 2005 6:59 PM
Now we're starting to get somewhere.
-
 Quarter_and_Paint_Project 072May 10, 2005 7:00 PM
But this has to get aligned better still.
-
 Quarter_and_Paint_Project 073May 10, 2005 7:01 PM
This also needs to be aligned up better.
-
 Quarter_and_Paint_Project 074May 10, 2005 7:04 PM
A bit closer, sorry for the glare from the flash.
-
 Quarter_and_Paint_Project 075May 10, 2005 7:06 PM
Looking towards the back at the fender well area. More precisely to help get your bearing the camera is positioned about where the lower portion of the right rear wheel.
-
 Quarter_and_Paint_Project 078May 11, 2005 2:37 AM
Close up on the rear looking down from outside.
-
 Quarter_and_Paint_Project 082May 11, 2005 2:38 AM
Really close up, sorry if it's a tad blurry.
-
 Quarter_and_Paint_Project 083May 11, 2005 2:38 AM
one more angle from the right.
-
 Quarter_and_Paint_Project 092May 13, 2005 10:45 PM
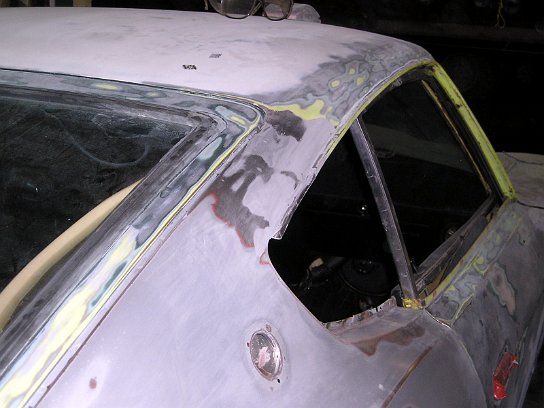
Looking at the upper seem area above the quarter window.
-
 Quarter_and_Paint_Project 093May 13, 2005 10:45 PM
Looking toward the rear.
-
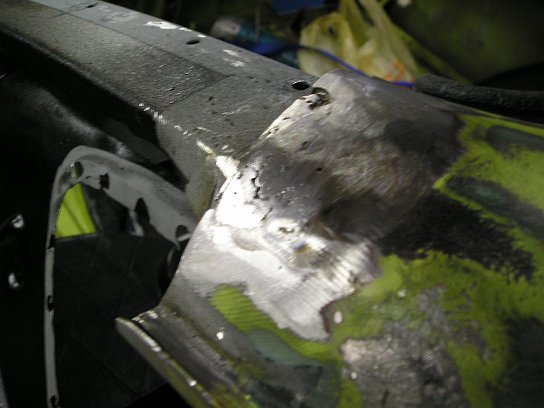
 Quarter_and_Paint_Project 084May 13, 2005 3:59 PM
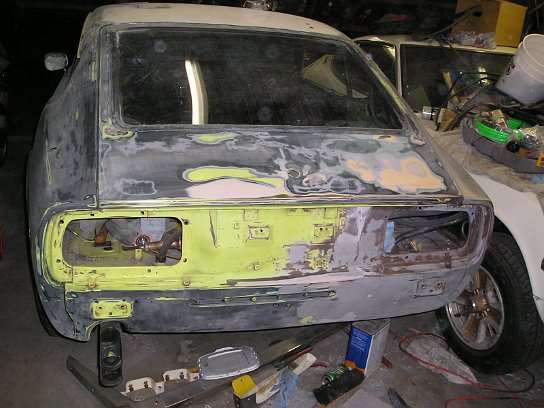
Primered and painted and looking a thousand times better than before. There is still a few areas we need to fabricate some new metal for.
-
 Quarter_and_Paint_Project 085May 13, 2005 3:59 PM
Of course the other side gets the same treatment. Might as well right only plan on seeing this part of the car once hahaha
-
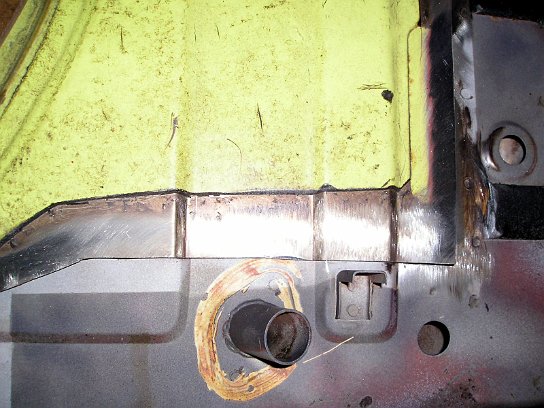
 Quarter_and_Paint_Project 086May 13, 2005 3:59 PM
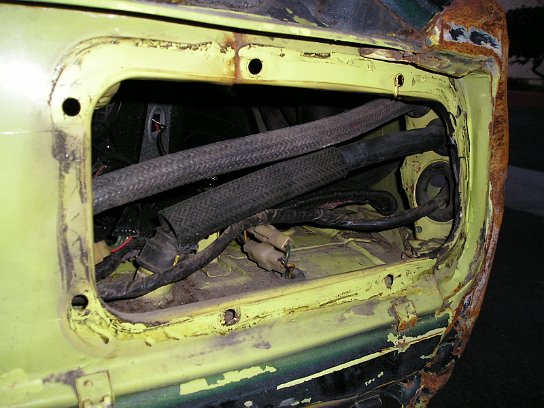
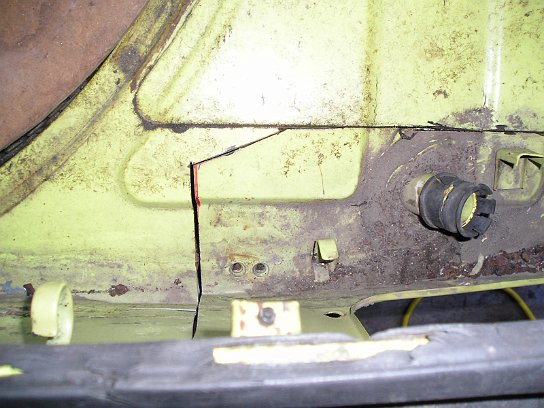
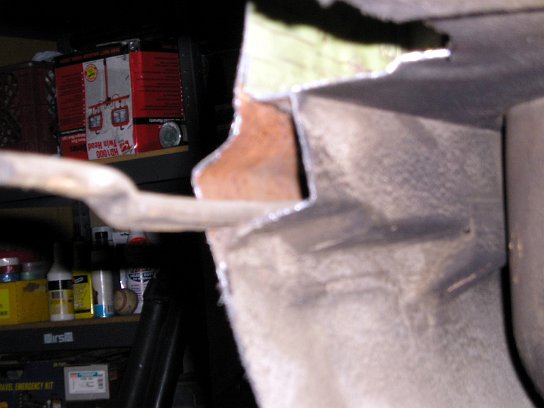
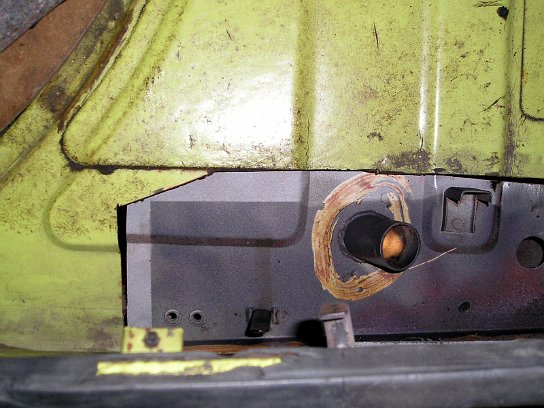
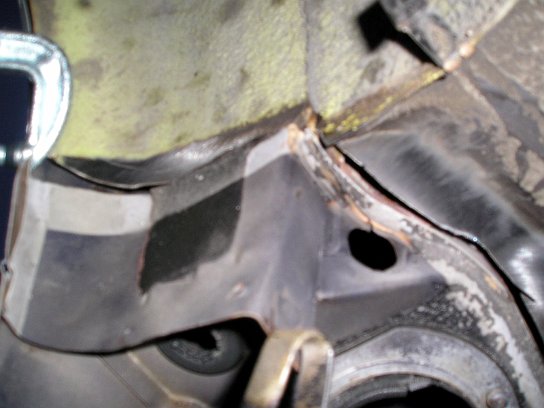
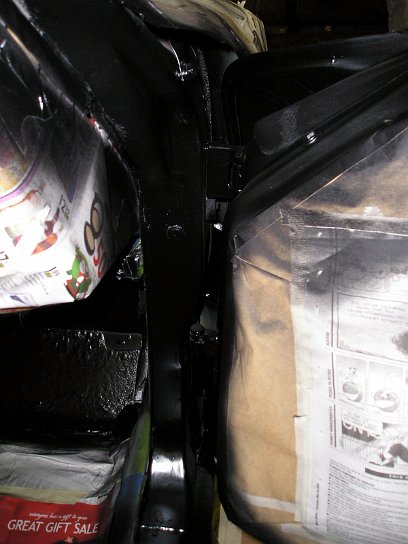
For those curious or you ever wanted to know how they routed the electrical you can see right here the wires wrapped in protective wrapping.
-
 Quarter_and_Paint_Project 087May 13, 2005 4:00 PM
Makes one wonder what the other 2 holes were for ? I see the electrical going through the bottom one but nothing through the other 2.
-
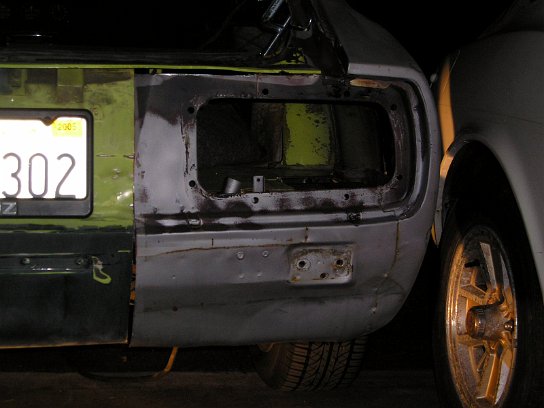
 Quarter_and_Paint_Project 088May 13, 2005 10:38 PM
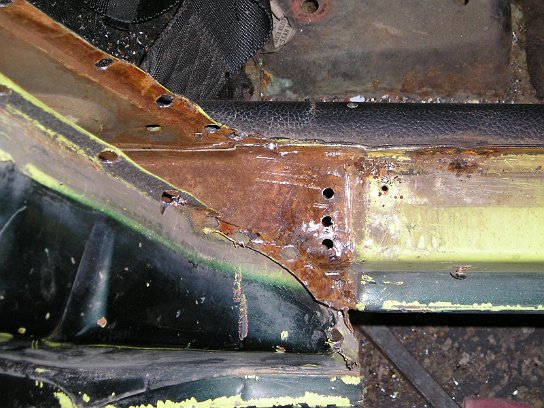
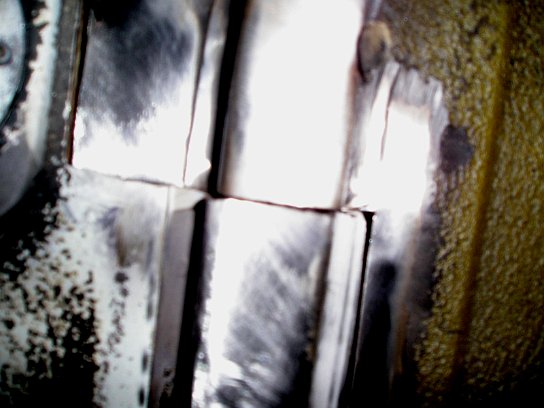
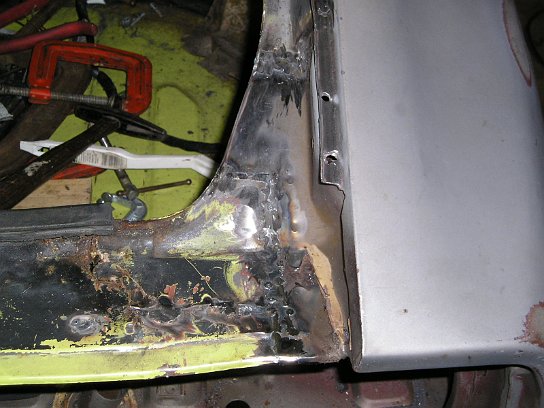
Here you can see where we repaired the corners that were eaten by the rust that was formerly there.
-
 Quarter_and_Paint_Project 089May 13, 2005 10:39 PM
Close up,
-
 Quarter_and_Paint_Project 090May 13, 2005 10:39 PM
Another close up shot of the other one.
-
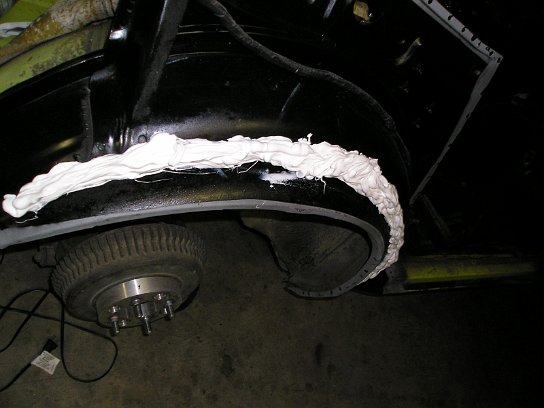
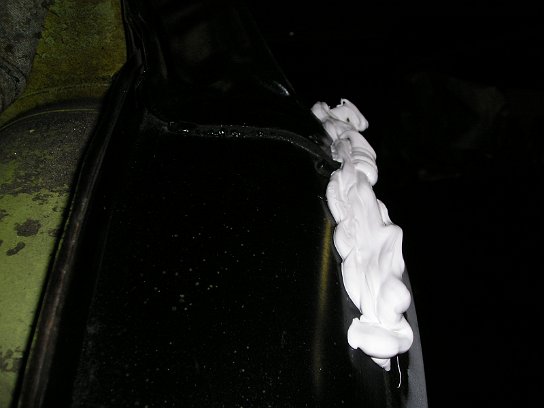
 Quarter_and_Paint_Project 095May 13, 2005 11:39 PM
And tons of sound deadoning/sealant.
-
 Quarter_and_Paint_Project 094May 13, 2005 11:40 PM
 -
 Quarter_and_Paint_Project 096May 13, 2005 11:41 PM
Guide tabs I tacked on to help align the rear
-
 Quarter_and_Paint_Project 097May 13, 2005 11:42 PM
Again from underneath.
-
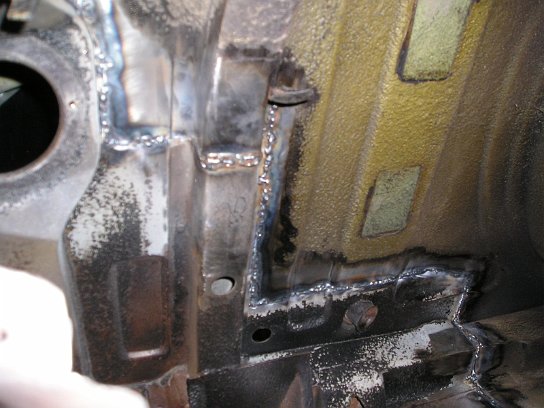
 Quarter_and_Paint_Project 098May 14, 2005 4:04 AM
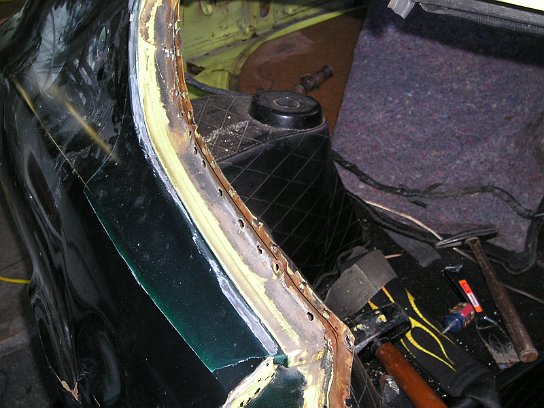
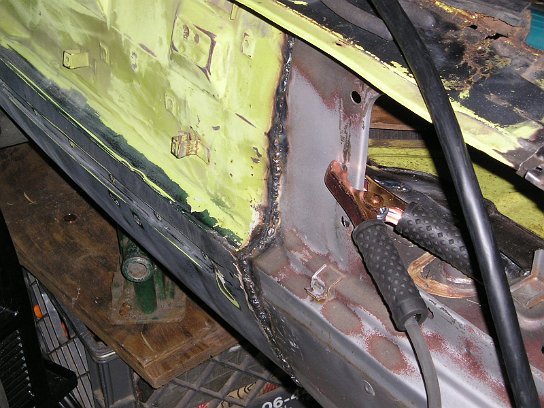
The rear's now welded in place.
-
 Quarter_and_Paint_Project 099May 14, 2005 4:04 AM
Closer shot
-
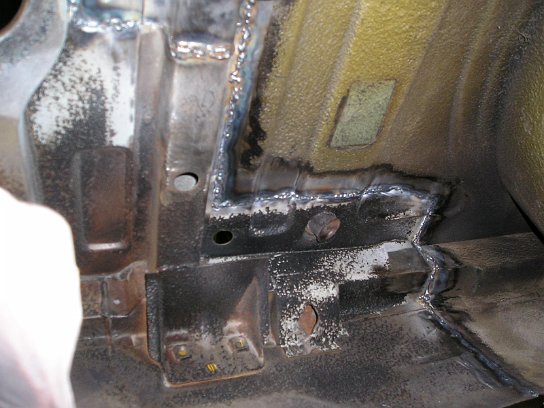
 Quarter_and_Paint_Project 100May 14, 2005 4:04 AM
From the right.
-
 Quarter_and_Paint_Project 101May 14, 2005 4:05 AM
Doh! Can you see our error ?
-
 Quarter_and_Paint_Project 102May 14, 2005 4:14 AM
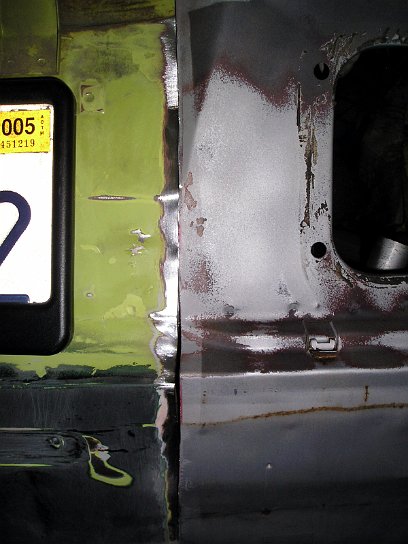
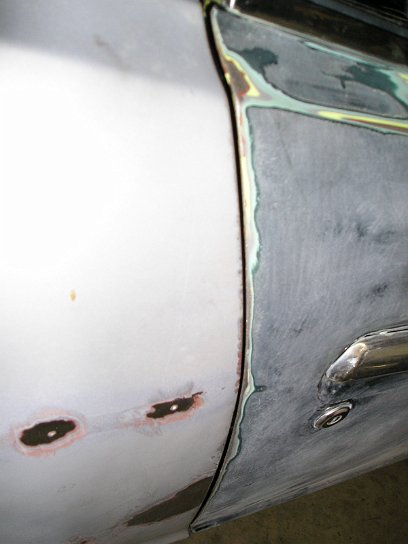
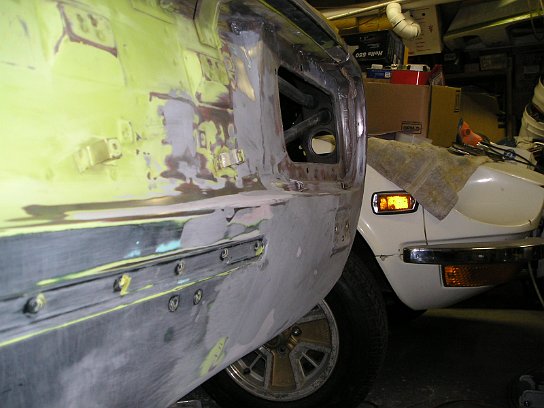
Door still to close will need to adjust it some, but it shuts and doesn't overlap so we're good.
-
 Quarter_and_Paint_Project 103May 14, 2005 4:14 AM
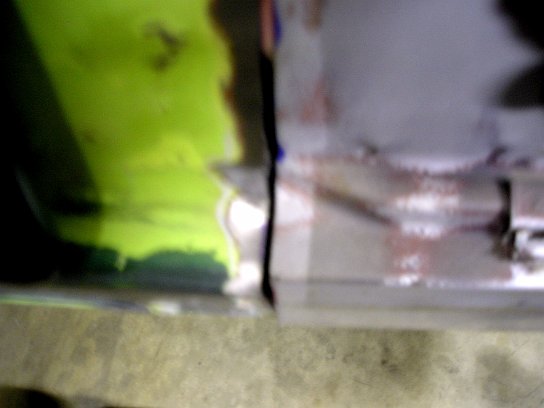
A little closer from more towards the rear and you can see better even without adjustment yet there is again a slight space between the door and the quarter panel.
-
 Quarter_and_Paint_Project 104May 14, 2005 4:15 AM
...and a really close up shot.
-
 Quarter_and_Paint_Project 105May 14, 2005 4:18 AM
Doing good the quarter window fits in ok. Just set it there for now to make sure we're headed in the right direction
-
 Quarter_and_Paint_Project 106May 14, 2005 6:40 AM
Ok some shaving off the front will be needed to gain more space.
-
 Quarter_and_Paint_Project 107May 14, 2005 6:40 AM
OLYMPUS DIGITAL CAMERA
-
 Quarter_and_Paint_Project 108May 14, 2005 6:40 AM
Showing the gap in front I have to work with.
-
 Quarter_and_Paint_Project 110May 14, 2005 9:13 PM
Lol my master piece haha I goofed and had to make a thin L shaped sliver to weld in place and bridge the gap between the old decklid to the new.
-
 Quarter_and_Paint_Project 112May 15, 2005 2:55 AM
We were able to reuse the original lead filler via heatgun and putty knives to help join the two haves,
-
 Quarter_and_Paint_Project 113May 15, 2005 2:55 AM
 -
 Quarter_and_Paint_Project 114May 15, 2005 3:03 AM
Underside welded in.
-
 Quarter_and_Paint_Project 115May 15, 2005 3:04 AM
Another angle.
-
 Quarter_and_Paint_Project 116May 15, 2005 3:04 AM
Yet another angle, tried to fit it all in there but this is about as far back as I can get not breaking the laws of phisics.
-
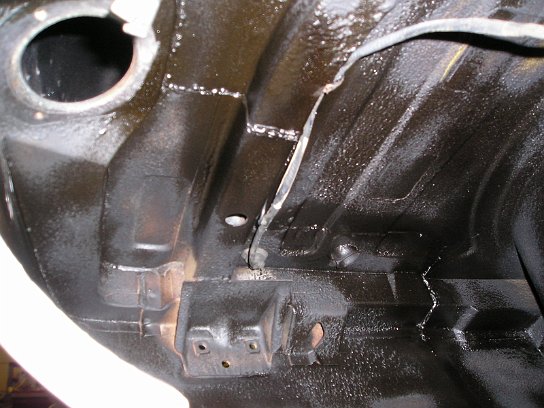
 Quarter_and_Paint_Project 117May 15, 2005 3:58 AM
Sealed with a new coat of under carrage spray on paint.
-
 Quarter_and_Paint_Project 120May 15, 2005 7:21 AM
Starting to look whole again.
-
 Quarter_and_Paint_Project 121May 15, 2005 7:21 AM
 -
 Quarter_and_Paint_Project 123May 18, 2005 2:07 AM
And now the smoothing phase begins.
-
 Quarter_and_Paint_Project 124May 18, 2005 2:07 AM
Slight change in elevation along this ridge but not bad considering.
-
 Quarter_and_Paint_Project 125May 18, 2005 2:07 AM
Some more angles.
-
 Quarter_and_Paint_Project 126May 18, 2005 2:07 AM
 -
 Quarter_and_Paint_Project 127May 18, 2005 2:07 AM
The top seam smoothed too.
-
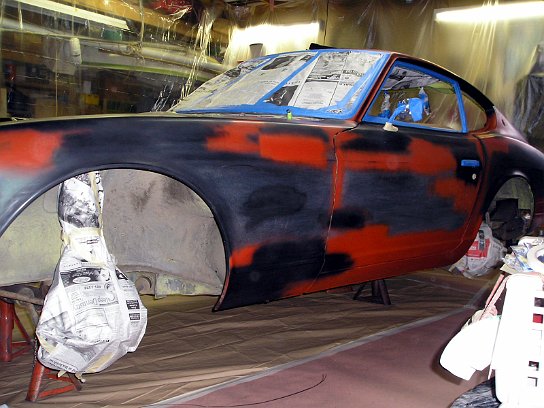
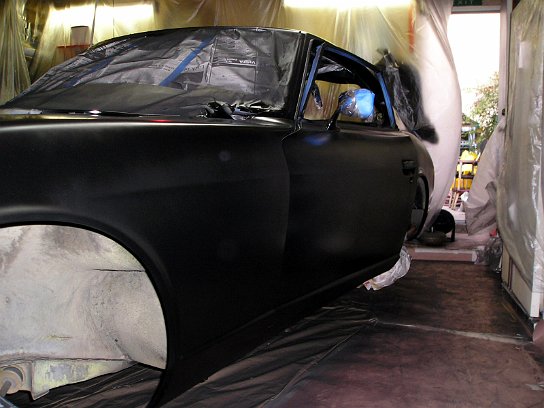
 Quarter_and_Paint_Project 128May 20, 2005 3:54 PM
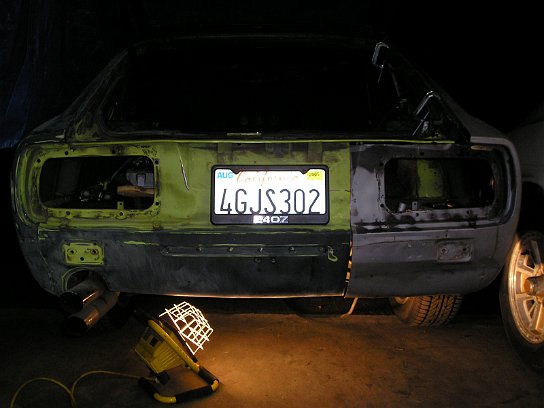
Quick spray paint job on the rear just to see what it looked like in one color.
-
 Quarter_and_Paint_Project 129May 20, 2005 3:58 PM
Not bad if I do say so myself.
-
 Quarter_and_Paint_Project 130May 20, 2005 3:59 PM
Sweet I'm lkin it!
-
 Quarter_and_Paint_Project 132May 20, 2005 4:01 PM
OLYMPUS DIGITAL CAMERA
-
 Quarter_and_Paint_Project 133May 21, 2005 10:09 PM
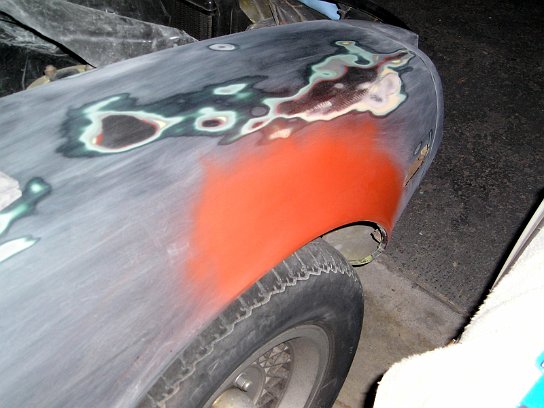
Now to primer and sand some more.
-
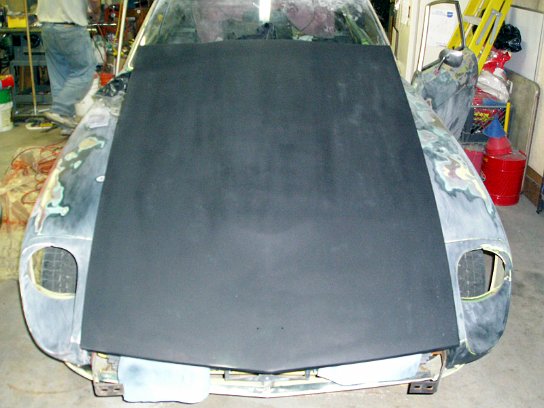
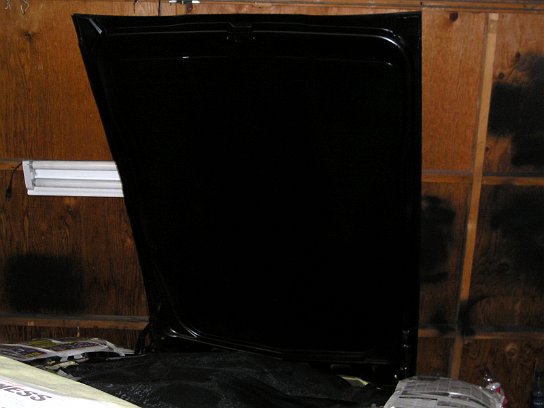
 Quarter_and_Paint_Project 134May 21, 2005 10:09 PM
I was able to get the slight dent out of the hood and then primered the whole thing then sanded again.
-
 Quarter_and_Paint_Project 135May 21, 2005 10:09 PM
Sugar scoops prepped.
-
 Quarter_and_Paint_Project 136May 22, 2005 9:28 PM
Good coating of thick primer.
-
 Quarter_and_Paint_Project 137May 22, 2005 9:29 PM
OLYMPUS DIGITAL CAMERA
-
 Quarter_and_Paint_Project 138May 22, 2005 9:29 PM
OLYMPUS DIGITAL CAMERA
-
 Quarter_and_Paint_Project 139May 22, 2005 9:29 PM
OLYMPUS DIGITAL CAMERA
-
 Quarter_and_Paint_Project 140May 23, 2005 8:25 PM
OLYMPUS DIGITAL CAMERA
-
 Quarter_and_Paint_Project 141May 23, 2005 8:25 PM
More sanding.
-
 Quarter_and_Paint_Project 142May 26, 2005 12:01 AM
Looks like a tiger in this shot lol.
-
 Quarter_and_Paint_Project 143May 26, 2005 12:01 AM
Still sanding ?
-
 Quarter_and_Paint_Project 144May 26, 2005 12:02 AM
Rinsed off.
-
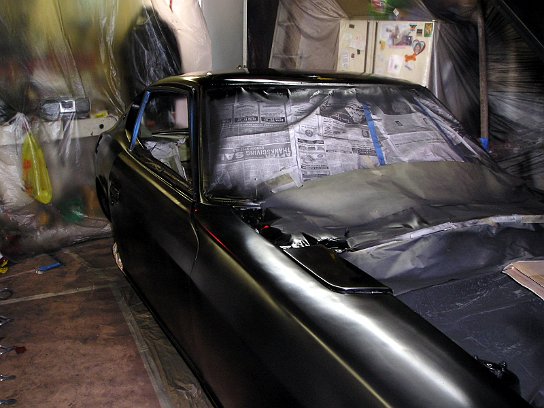
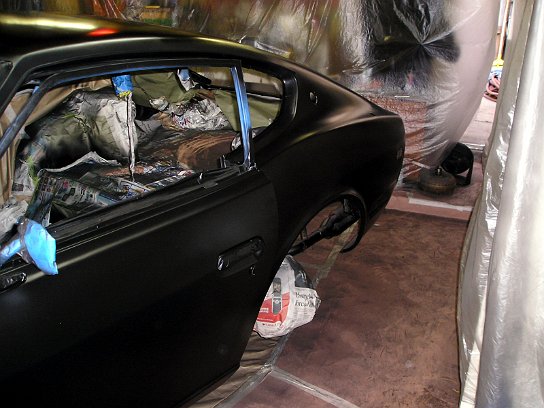
 Quarter_and_Paint_Project 146May 29, 2005 3:30 PM
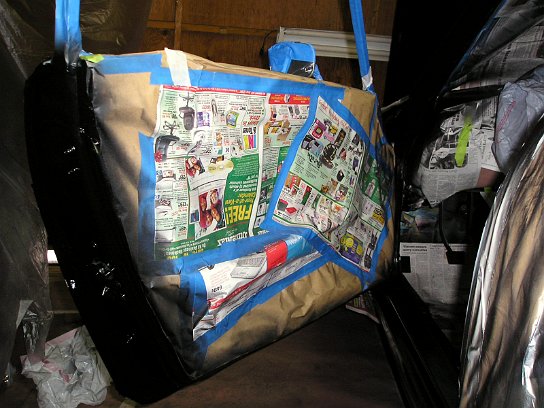
Removed rear hatch and began masking everything, getting ready for paint.
-
 Quarter_and_Paint_Project 145May 29, 2005 3:31 PM
Inside is going to get it too.
-
 Quarter_and_Paint_Project 147May 29, 2005 3:31 PM
OLYMPUS DIGITAL CAMERA
-
 Quarter_and_Paint_Project 148May 29, 2005 3:33 PM
OLYMPUS DIGITAL CAMERA
-
 Quarter_and_Paint_Project 149May 29, 2005 3:36 PM
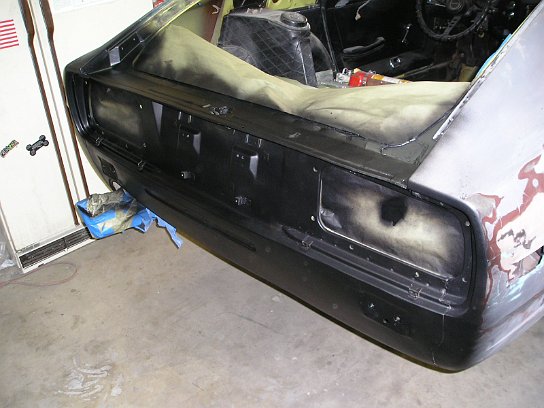
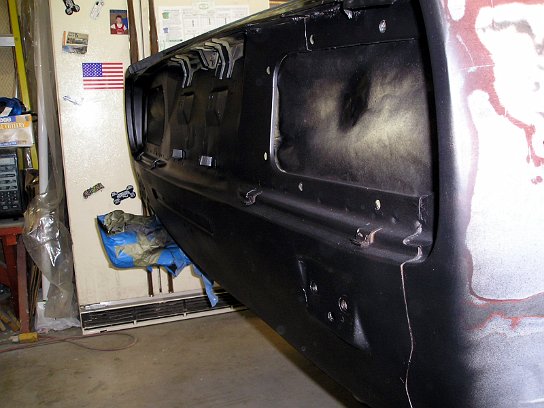
Hide away panels painted.
-
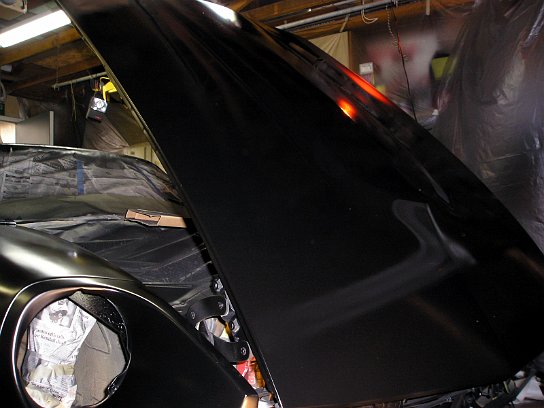
 Quarter_and_Paint_Project 150May 29, 2005 3:37 PM
Once the inner panels were dry they get layed over so the outsides can get painted along with the rest.
-
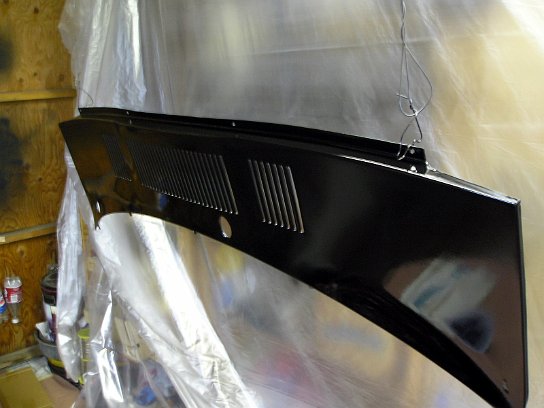
 Quarter_and_Paint_Project 156May 31, 2005 12:45 AM
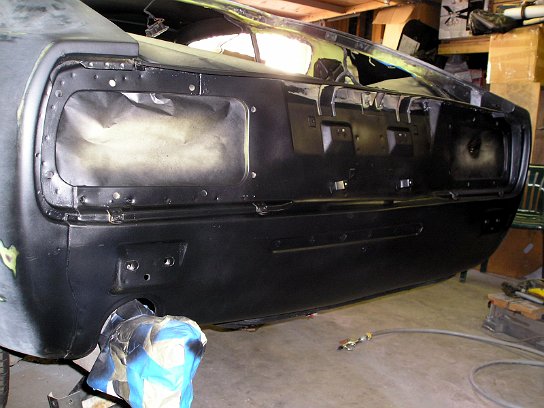
Firewall grill painted.
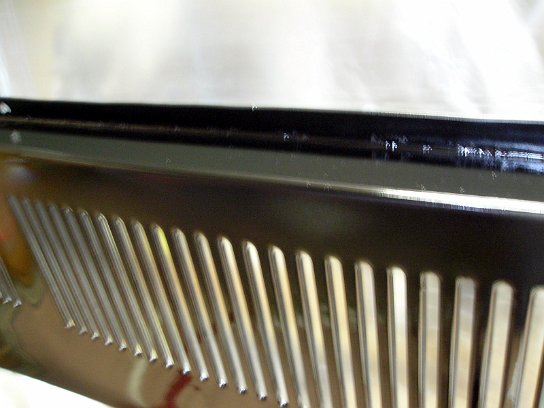
-
 Quarter_and_Paint_Project 157May 31, 2005 12:45 AM
I can see myself in the shot so I'll stop with this one.
-
 Quarter_and_Paint_Project 158May 31, 2005 12:45 AM
Different angle.
-
 Quarter_and_Paint_Project 159May 31, 2005 12:46 AM
Good here too. Gas cap painted.
-
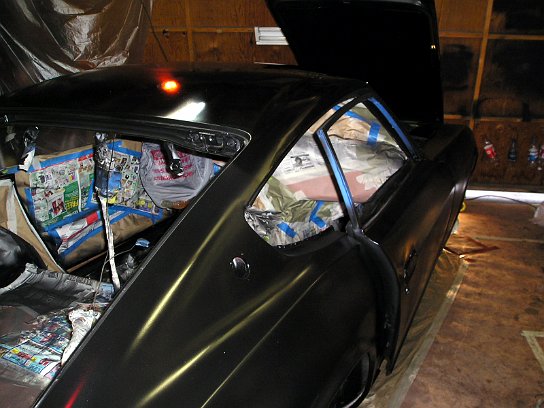
 Quarter_and_Paint_Project 160May 31, 2005 2:20 AM
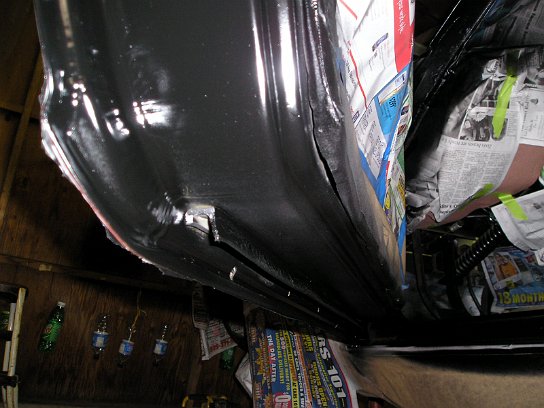
Rear hatch painted.
-
 Quarter_and_Paint_Project 162May 31, 2005 2:20 AM
A closer shot.
-
 Quarter_and_Paint_Project 166May 31, 2005 2:23 AM
Floorboards done.
-
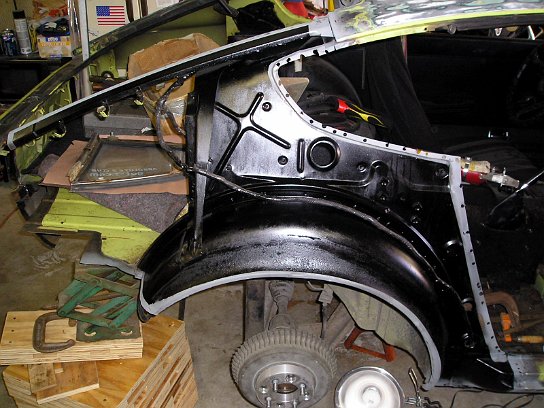
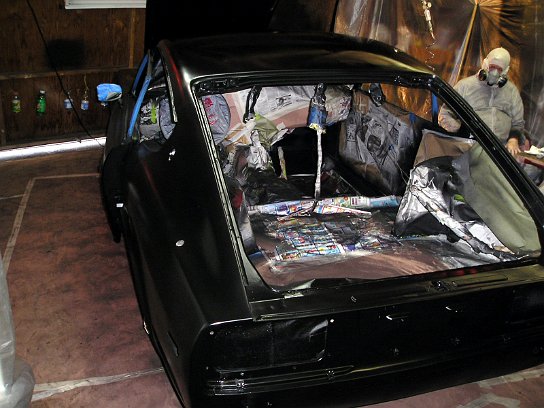
 Quarter_and_Paint_Project 167May 31, 2005 3:57 AM
...and the rear half is done now as well.
-
 Quarter_and_Paint_Project 168May 31, 2005 3:57 AM
From the other side.
-
 Quarter_and_Paint_Project 169May 31, 2005 3:58 AM
Now one nice black color.
-
 Quarter_and_Paint_Project 170June 1, 2005 1:46 PM
Now I'm going to shut up for awhile cause you don't need me to tell you what the next few pictures are basically I took photos as I got various parts done.
-
 Quarter_and_Paint_Project 171June 1, 2005 1:46 PM
OLYMPUS DIGITAL CAMERA
-
 Quarter_and_Paint_Project 177June 1, 2005 1:47 PM
OLYMPUS DIGITAL CAMERA
-
 Quarter_and_Paint_Project 174June 1, 2005 1:47 PM
OLYMPUS DIGITAL CAMERA
-
 Quarter_and_Paint_Project 176June 1, 2005 1:47 PM
OLYMPUS DIGITAL CAMERA
-
 Quarter_and_Paint_Project 175June 1, 2005 1:48 PM
OLYMPUS DIGITAL CAMERA
-
 Quarter_and_Paint_Project 173June 1, 2005 1:48 PM
OLYMPUS DIGITAL CAMERA
-
 Quarter_and_Paint_Project 178June 1, 2005 5:41 PM
OLYMPUS DIGITAL CAMERA
-
 Quarter_and_Paint_Project 179June 1, 2005 5:41 PM
OLYMPUS DIGITAL CAMERA
-
 Quarter_and_Paint_Project 180June 1, 2005 5:41 PM
OLYMPUS DIGITAL CAMERA
-
 Quarter_and_Paint_Project 181June 1, 2005 5:42 PM
OLYMPUS DIGITAL CAMERA
-
 Quarter_and_Paint_Project 182June 1, 2005 5:43 PM
OLYMPUS DIGITAL CAMERA
-
 Quarter_and_Paint_Project 183June 1, 2005 5:44 PM
OLYMPUS DIGITAL CAMERA
-
 Quarter_and_Paint_Project 184June 1, 2005 5:44 PM
OLYMPUS DIGITAL CAMERA
-
 Quarter_and_Paint_Project 185June 1, 2005 5:45 PM
OLYMPUS DIGITAL CAMERA
-
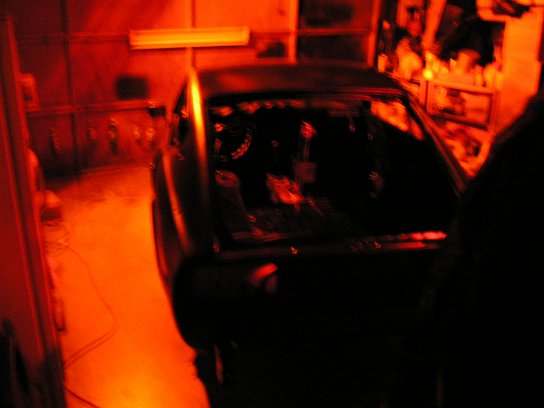
 Quarter_and_Paint_Project 191June 1, 2005 10:51 PM
Now I'm just waiting for it to dry under the warm glow of the heat lamps.
-
 Quarter_and_Paint_Project 195June 1, 2005 10:51 PM
 -
 Quarter_and_Paint_Project 190June 1, 2005 10:52 PM
Now with the regular lights back on.
-
 Quarter_and_Paint_Project 192June 1, 2005 10:53 PM
Now with just daylight and the subtle glow of the lamps still helping cure the paint.
-
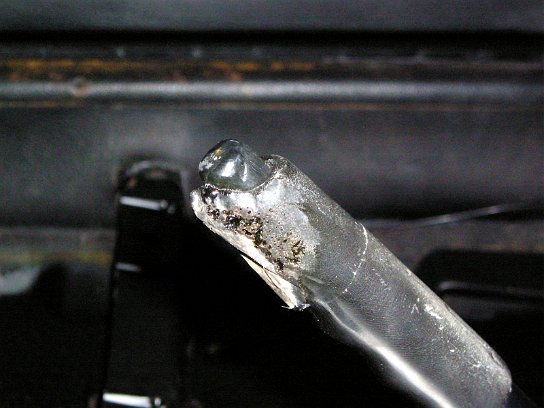
 Quarter_and_Paint_Project 194June 2, 2005 2:30 AM
A casualty of war..seems we didn't pay enough attention to one of the drop lights and as you can see it didn't get along with my e-brake handle too well.
-
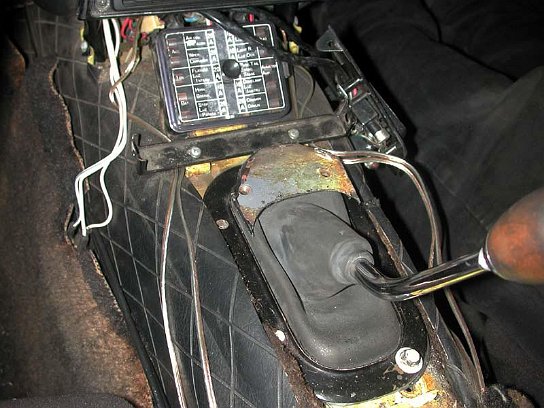
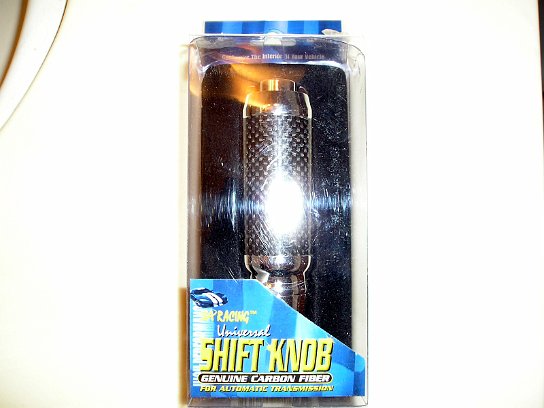
 Ebrake handle 002June 2, 2005 8:42 PM
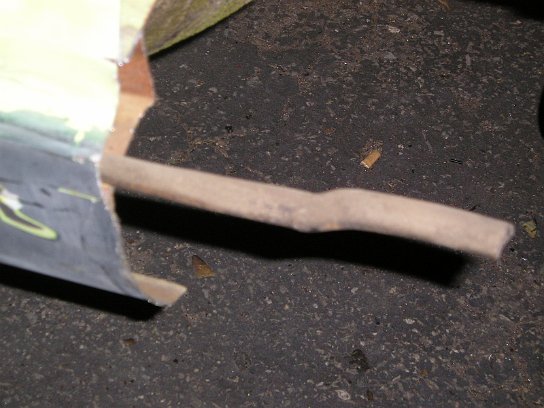
No matter, time for some ingenuity. Yeah I know it says shift knob not e-brake but they don't sell e-brake handles at your local automotive store...soo
-
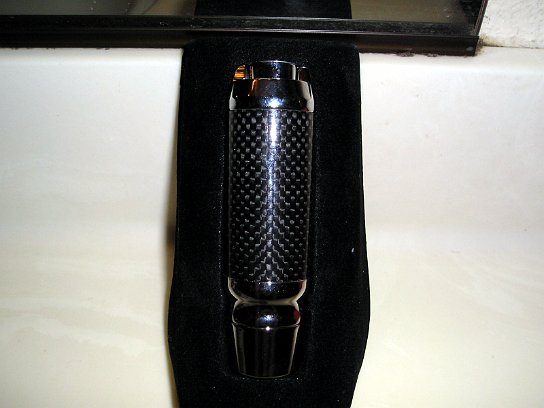
 Ebrake handle 003June 2, 2005 8:53 PM
...I'm going to take this bad boy...
-
 Ebrake handle 009June 3, 2005 10:20 AM
...and MacGyver it on like this.
-
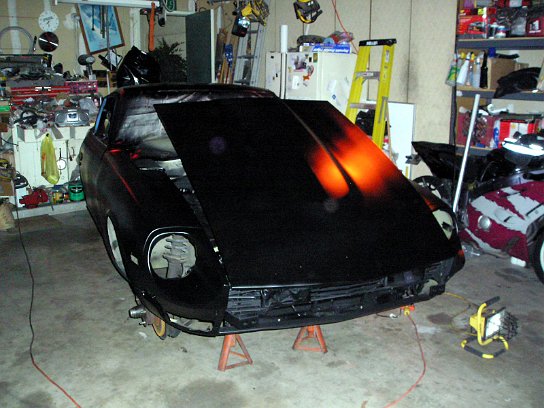
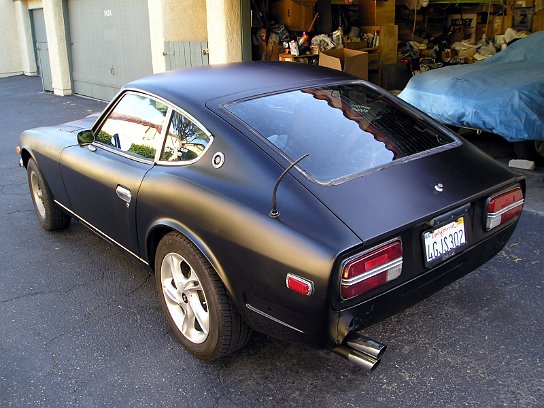
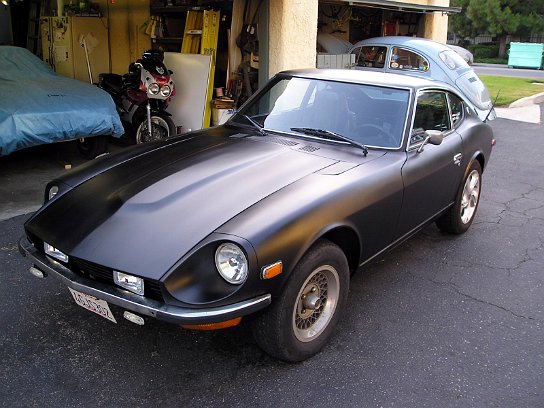
 Satinblack 001June 6, 2005 5:55 PM
Just finished putting everything back together, ready to hit the pavement.
-
 Satinblack 002June 6, 2005 5:55 PM
I'm really happy with the outcome.
-
 Satinblack 005June 6, 2005 6:09 PM
Was alot of work but it paid off :)
-
 Satinblack 006June 6, 2005 6:09 PM
...and one more angle to complete the 360.
-
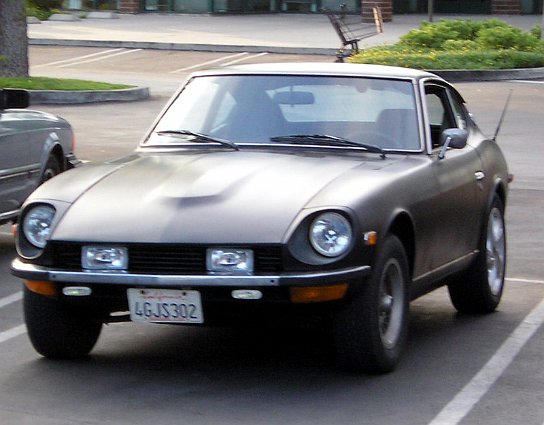
 Satinblack_smlJune 5, 2005 6:19 PM
First time out back on the road with a pit-stop at Starbucks.
-
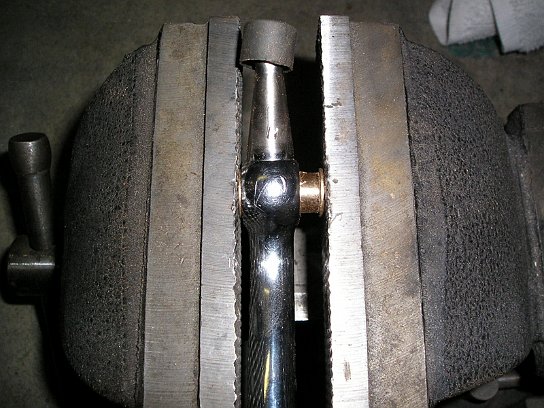
 Shifter3June 29, 2005 9:20 PM
Have a loose shifter ? Kragen sells "help" product brass bushings that will fix that slop. Just pres them in with a vise.
-
 Shifter4June 29, 2005 9:22 PM
Like such.
-
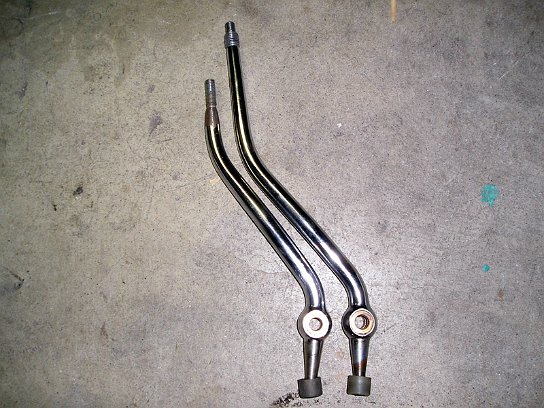
 Shifter2June 29, 2005 9:52 PM
New short shifter custom made by a friend from the z club. It doesn't look that much shorter here but look at the pictures with it installed. What a difference too you can really feel the change in throw.
-
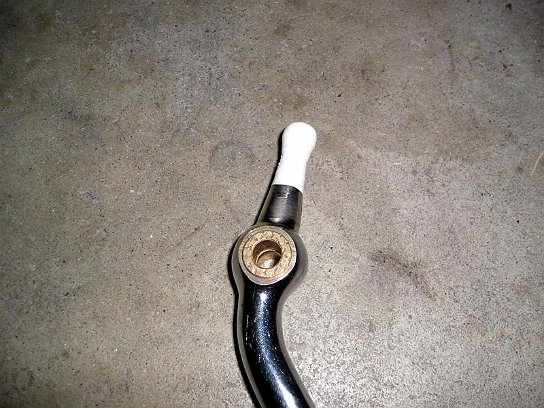
 Shifter5June 29, 2005 10:22 PM
You can use tephlon tape to make that worn plastic busing a lot firmer.
-
 ShifterJune 29, 2005 10:23 PM
Stock shifter.
-
 Shifter1June 29, 2005 11:11 PM
Custom short shifter.
-
 SeatcoversAugust 2, 2005 7:22 PM
Newly installed seat covers. Pretty comfy and you wont stick to it on hot days.
-
 IMG_9061August 7, 2005 12:10 AM
This was taken on Angeles Crest hwy with 2 more z buddies, no photo editing short of a slow shutter speed. I think I'm going to take the original and blow it up into a poster. I just think it came out awesome and represents all 3 generations before the break in Z production prior to the release of the new 350 and 370 Z's.
-
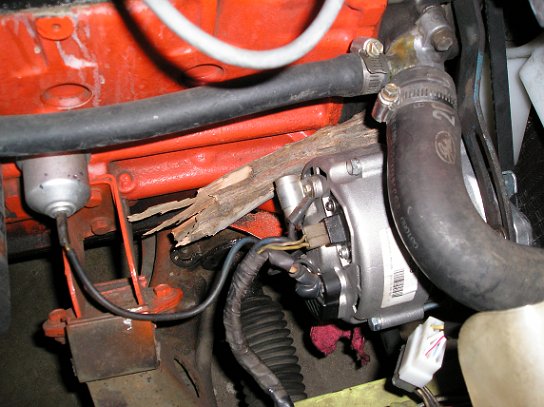
 Bear-damaged-alternatorAugust 7, 2005 12:14 AM
LMAO ...This here tree branch put pressure on my alternator giving just enough tension on the belt to limp to a friends house to repair it correctly. Some background info, this was later the same night we took the "Pit-Stop" photo, came around a corner and hit the last small bear in a line of 3 after veering to avoid the first 2 but couldn't avoid the 3rd. Yes I said bear, that was not a typo, anyway the impact broke my alternator mounting bolt and trees were the only parts around hahaha. Picture in your head this scenario, there are 3 of us in row, me in the 240Z, followed by the 300ZX, followed by the 280ZX, now I hit it first with my lower left front then it somehow spund around the 2nd car and was keel hulled by the 3rd. Still it managed to get up and run away (at least I think cause we couldn't find it).
-
 X-mas-gifts-wheel1December 29, 2005 5:19 PM
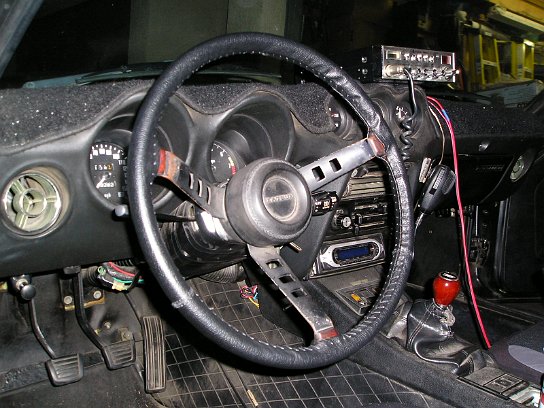
STeering wheel swap from a wrapped stock one.
-
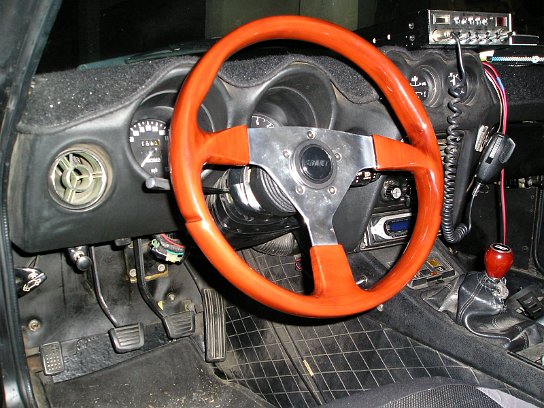
 X-mas-gifts-wheel2December 29, 2005 7:29 PM
To a nice cherry wood one :)
-
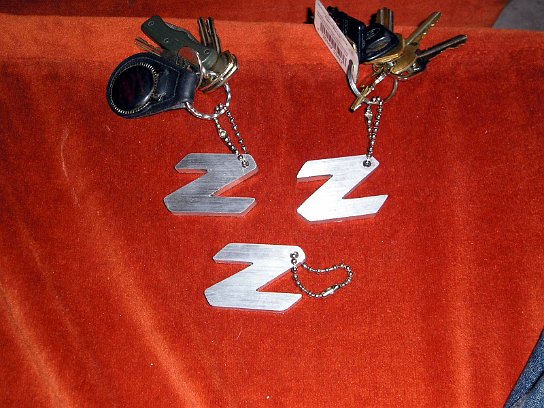
 X-mas-gifts-keyfobsJanuary 27, 2006 9:28 AM
Custom Z shaped key fobs, made by a friend from got-z (you know who you are if you are reading this and thanks!)